Original Link: https://www.anandtech.com/show/1586
Nikon Coolpix 8400: A Wide Angle Solution
by Stephen Caston on January 12, 2005 12:05 AM EST- Posted in
- Digital Camera
Index

Click to enlarge.
When the Nikon Coolpix 8400 was released, it became the widest lens SLR-like digicam on the market. It offers an eight megapixel output resolution with a full array of exposure modes from full auto to manual. It has a twist and flip LCD monitor design and a high resolution electronic viewfinder. The 8400 is packed with features such as 15 preset Scene modes, BSS (Best Shot Selector), Ultra HS shooting mode, and much more. In our review, we discovered that it offers a good amount to its users. It is capable of producing high quality images with exceptional color reproduction. The 8400 can record JPEG images with low compression that are free from JPEG artifacts. In addition, it offers TIFF and RAW recording options. In our review, we found that there are several strengths and weaknesses in regard to image quality. Read on for a full review of this feature-packed, wide angle digicam.
Product Sample provided by Newegg.com.
Nikon Coolpix 8400 Specifications
| Nikon Coolpix 8400 | |
| Release Date | September 2004 |
| Price | ~$700 |
| Pixel Count | 8.0 Million |
| Camera Type | SLR-like |
| Highest Resolution | 3264x2448 |
| Lower Resolutions | 3264x2176, 2592x1944, 2048x1536, 1600x1200, 1280x960, 1024x768, 640x480 |
| Sensor Type | CCD |
| Sensor Size | 2/3" |
| LCD Screen Size | 1.8" foldout/twist |
| Optical Zoom | 3.5x, 24 - 85mm equivalent |
| Focus Range | 1.7' - Infinity |
| Macro | W: 1.2"; T: 7.9" |
| Digital Zoom | Up to 4x |
| Lens Thread | Fits accessory lenses and filters |
| Auto Focus | Yes |
| Auto Focus Type | TTL contrast-detect, Ranging sensor |
| AF-assist Lamp | Yes |
| Manual Focus | Yes |
| Aperture Range | W: f2.6 - 7.2; T: f4.9 - 7.7 |
| Shutter Speeds | Bulb - 1/3000th sec. |
| ISO | Auto, 50, 100, 200, 400 |
| Flash | Built-in, accessory shoe |
| Flash Range | W: 1.7 - 19.7'; T: 1.7 - 9.8' |
| Flash Compensation | +/- 2 stops in 1/3 increments |
| Exposure Compensation | +/- 2 stops in 1/3 increments |
| White Balance | Auto, Manual, Daylight, Incandescent, Fluorescent, Cloudy, Speedlight, Shade |
| Bracketing | Yes, 0.3, 0.5, or 1.0 EV for 3 or 5 shots |
| Metering | 256-segment, Center-weighted, Spot, Spot AF area |
| Color Space | RGB, sRGB |
| Aperture Priority | Yes |
| Shutter Speed Priority | Yes |
| Manual Exposure | Yes |
| Continuous Drive | Yes, 2.3 fps "Extra" quality |
| Self-Timer | Yes, 10, 3 sec. |
| Storage Method | CompactFlash Type I and II, Microdrive |
| Storage Included | None |
| Compressed Format | JPG |
| Uncompressed Format | TIFF, NEF |
| Quality Settings | RAW, Hi, Extra, Fine, Normal, Basic |
| Video clips | 640x480 at 30fps (max 60 sec.), 320x240 at 15 fps (no limit), w/sound, QuickTime MOV |
| Battery Type | Rechargeable EN-EL7 Li-ion |
| Charger Included | Yes, 2.5 hours |
| PC Interface | USB |
| TV-out | Yes |
| Tripod Mount | Yes, metal |
| Weight (w/out battery or card) | 14 oz. |
| Dimensions | 113 x 82 x 75 mm |
| Included in the Box |
|
 |
 |
| Click images to enlarge. | |
The front of the Coolpix 8400 features its ED (extra low dispersion), 3x optical lens. This 3x zoom lens has one major difference than any other compact digicam on the market right now - a remarkable wide angle of 24mm. The lens can be protected with the included lens cap, which can be attached to the camera with the supplied cord. In between the lens and the built-in, pop-up flash is a tiny microphone. The built-in flash has a working range of 1.7' - 19.7' at wide angle and 1.7' - 9.8' at telephoto. To the right of the flash is a circular AF-assist lamp. Below this is the AF ranging sensor. At the lower-right corner of the camera is the infrared receiver for the included remote controller.

Click to enlarge.
The back of the 8400 features a 1.8" LCD screen with 134K pixels. The LCD monitor has a twist and flip design, meaning that it can be folded out and rotated 90° in one direction and 180° in the other. By rotating the LCD, pictures can be framed from a variety of angles that would be impossible with a fixed monitor design. Above the LCD monitor is the electronic viewfinder that is surrounded with rubber. Just to the left of the viewfinder is a diopter adjustment knob. Since the viewfinder is electronic, it displays the exact same information as the LCD monitor. It can be enabled by folding the LCD monitor back into the camera body. To the right of the viewfinder are the AE/AF lock button and the zoom controller. At the upper-right corner is the "Command Dial". To the right of the LCD monitor are the Menu, Quick Review, Delete/Self-timer, and Display buttons along with a multi-directional controller with a separate "set" button in the middle. Below the LCD monitor are the Focus and Monitor buttons.

Click to enlarge.
On the top of the camera, just above the viewfinder, we can see the flash hot shoe that can be protected with a plastic tab, which slides into place. To the right of the hot shoe is the "Control Panel" that displays shooting information while the camera is on. At the lower-right is the Mode dial that is used to select the desired shooting mode. Just above and to the left of the Mode dial is the LCD illuminator button. After pressing this button, the Control Panel will light up for approximately 8 seconds before turning off again. On the top of the handgrip are three main buttons: Function, Flash mode, and Exposure Compensation/Voice Memo. Finally, surrounding the shutter button is the main power switch.
 |
 |
| Click images to enlarge. | |
On the bottom of the camera is the battery compartment for the included EN-EL7 rechargeable Li-ion battery. The battery is kept in place and protected by a hinged door with a locking mechanism. To the right is the metal tripod mount, which is offset from the lens, but centered on the camera. The tripod mount is surrounded by rubber grips to help add traction when it is mounted on a tripod.
 |
 |
| Click images to enlarge. | |
On the right side is a swinging door that reveals the flash compartment. The Coolpix 8400 supports Compact Flash (type I and II) and Microdrive storage cards. Above and to the right of the flash compartment is the 8.4V DC-in port for the optional AC adapter. The port is protected by a rubber tab that is attached to the camera. There is also a post for the neck strap on this side.
 |
 |
| Click images to enlarge. | |
On the left side of the camera is a rubber tab that covers the A/V-out and USB ports. In addition, there is a speaker and the other post for the neck strap.
Recording Features
In all recording modes, the Coolpix 8400 can record images as either JPEG, TIFF, or NEF (RAW) files. In JPEG mode, the camera offers 4 quality options: Extra, Fine, Normal, and Basic. The resolution options are below:| Setting | Resolution (pixels) |
| 8M | 3264x2448 |
| 3:2 | 3264x2176 |
| 5M | 2592x1944 |
| 3M | 2048x1536 |
| 2M | 1600x1200 |
| 1M | 1280x960 |
| PC | 1024x768 |
| TV | 640x480 |
The Nikon Coolpix 8400 offers all the shooting modes that you would expect from an advanced digicam: Auto, Programmed Auto, Shutter-priority, Aperture-priority, and Manual. In addition, the camera offers 15 Scene presets and a Movie mode. Also on the Mode dial is a dedicated play mode and separate positions for quickly setting the White Balance, ISO, and Image Quality/Resolution. Finally, there is a Set Up mode.
In Auto mode, the camera determines most of the major shooting settings for you. In fact, the Menu button is completely disabled. However, there are still some options available to adjust. For example, the flash mode can be selected from the following options: Auto, Flash off, Auto w/Red-eye reduction, Fill-in, Slow sync, and Rear curtain sync. The Fill-in flash option forces the camera to use the flash, even if the camera does not deem it necessary. This can be useful in outdoor pictures when there is a significant backlight behind your subject. The Fill-in flash can be used to counter the shadows and illuminate the subject's face. The Slow sync options use a longer shutter speed. Selecting the first Slow sync option, the camera will first fire a flash. Then, the shutter will stay open longer to gather ambient light, resulting in a natural-looking flash picture. In Rear curtain sync, the camera will gather ambient light first and then fire the flash just before the shutter closes. The difference between the two is that if the subject is moving, the Rear curtain sync option will create an image where there is motion blur behind your subject. The opposite will be true for the first Slow sync option.
In Auto mode, the user can also apply E.C. (exposure compensation) up to +/- 2 stops in 1/3 stop increments. The AE/AF lock button can be used to lock the exposure and focus. In the advanced modes, you can choose the behavior of the AE/AF lock button. For example, you can set it to lock the exposure, focus, or both. In Auto mode, it locks both the exposure and focus (just as if you had half-pressed the shutter button). In Auto mode, you can enable Infinity or Macro focus. With the Infinity focus mode, the camera will simply focus the lens to infinity. In Macro mode, the camera can focus as close as 1.2" from the subject. A self-timer of 3 or 10 seconds can be enabled as well.
In Programmed-Auto mode, the camera sets the appropriate exposure automatically. However, by rotating the Command dial, you can alter the shutter speed/aperture equation. For example, by rotating the dial to the right, the aperture will open up and the shutter speed will quicken. Conversely, by rotating the dial to the left, the aperture will contract and the shutter speed will slow down. In Shutter speed priority mode, the user can select the desired shutter speed, while the camera selects the appropriate aperture. In Aperture priority mode, the user can select the desired aperture while the camera picks the shutter speed. Finally, in Manual mode, the user has total control over the exposure. The values are adjusted by rotating the Command dial. To switch between the shutter speed and aperture, you must press the Function button.
 Underexposed |
 Overexposed |
While adjusting the aperture and shutter speed values, a display will appear just above the values to indicate the exposure condition.
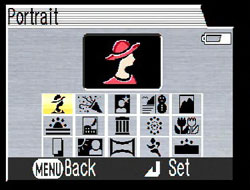
Scene selection screen
The final still recording option is Scene mode. After switching to Scene mode, pressing the Menu button will result in the appearance of the above screen, which displays the 15 available scene types. The scene types are described below:
| Scene | Effect |
| Portrait | Large aperture to create small depth-of-field with sharp subject and blurred background |
| Party/Indoor | Slow-sync flash to capture background lighting |
| Night portrait | Slow-sync flash; noise-reduction |
| Beach/Snow | Compensates automatically for bright scenes to create a bright exposure |
| Landscape | Focus is set to Infinity |
| Sunset | Saturates colors in sunsets/sunrises |
| Night landscape | Focus is set to Infinity; noise-reduction is applied |
| Museum | Flash is disabled; Best Shot Selector is enabled |
| Fireworks | Slow shutter speed; focus is set to Infinity |
| Close up | Camera focuses continuously until shutter button is pressed |
| Copy | Black & white image; used for photographing drawings, text, etc. |
| Backlight | Fill flash is used automatically to fill in shadows created by backlighting |
| Panorama assist | Used to take pictures that can be joined later with included software |
| Sports | Camera focuses continuously until shutter button is pressed; camera will shoot continuously at approximately 2.3 fps while shutter button is held down |
| Dusk/Dawn | Focus is set to Infinity; noise-reduction is applied; dusk/dawn hues are saturated |
 Typical |
 Live histogram |
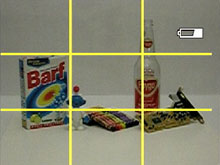 Grid |
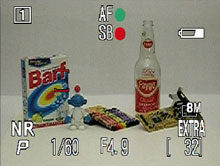
 No information |
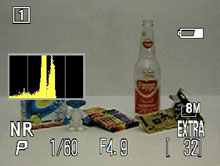
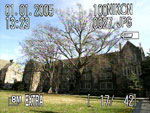
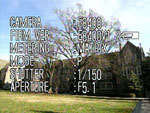
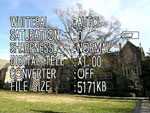
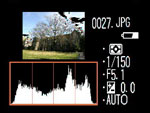
By pressing the Disp button, the camera will cycle through four possible displays. The first display contains information such as the current user memory bank, recording mode, shutter speed, aperture, resolution/quality, and remaining pictures. By pressing the Disp button, the camera will overlay a live histogram on the left side of the screen. Another press of the Disp button will clear the screen of all information other than a 3x3 grid for assistance in composition. A final press of the Disp button will clear the screen of all information other than the live image. At any time, a press of the Monitor button (below the Disp button) will toggle the display between the LCD monitor and the viewfinder.
In Programmed-Auto, Aperture-priority, Shutter-priority, and Manual modes, pressing the Menu button brings up several adjustable options. The first screen that will appear is called "My Menu", which is a screen with six customizable menu options. By selecting "Show all menus", however, we can see the full list of available options. Below, we have broken up these menu options into three separate tables:
| Menu (1/3) | |
| White balance | Auto, White bal. preset, Daylight, Incandescent, Fluorescent, Cloudy, Speedlight, Shade |
| Metering | Matrix, Spot, Center-weighted, Spot AF area |
| Continuous | Single, Continuous H, Continuous L, Multi-Shot 16, Ultra HS, 5 shot buffer, Interval timer shooting |
| BSS | BSS Off, BSS On, AE Exposure BSS |
| Image Adjustment | Auto, Normal, More contrast, Less contrast |
| Saturation Control | Auto, +2 Maximum, +1 Enhanced, +/- Normal, -1 Moderate, -2 Minimum, Black & White |
| User setting | 1, 2 |
For metering, the 8400 offers 4 different options: Matrix, Spot, Center-weighted, and Spot AF area. With Matrix metering, the camera measures light automatically from 256 areas of the frame in order to determine the appropriate exposure. When Spot is selected, the camera will measure light from an area that is 1/32 the size of the entire frame. This area is displayed as a small rectangle at the center of the screen. When Center-weighted metering is used, the camera places emphasis on the center of the frame in its exposure calculation. With Spot AF area metering, the camera will use spot metering on whichever focal point is used.
For drive options, the 8400 offers several possibilities. The default option "Single" means that the camera will only take one picture when you press the shutter button. With Continuous H, the camera can record up to 5 images in any JPEG quality/resolution and in RAW mode at 2.3 fps while the shutter button is held down. With the Continuous L setting, the camera can record up to 11 8M/Fine JPEG images at 1.2 fps while the shutter button is held down. When Multi-Shot 16 is selected, the camera will take 16 816x612 images in a row at 1.6 fps. These images are assembled automatically into a 3264x2448 image with 4 rows. With the Ultra HS mode, the camera will record up to 100 TV/Normal images at 30 fps while the shutter button is held down. The images are recorded to a new folder on the flash card. The option "5 shot buffer" allows you to shoot at 0.7 fps for as long as the shutter button is held down. However, the camera will only save the last 5 images that were taken. With the "Interval timer shooting", you can select from the following intervals: 0.5, 1, 5, 10, 30, or 60 minutes. After pressing the shutter button, the camera will take pictures at the specified interval until the shutter button is pressed again, the memory card fills up, the power source is interrupted, or when 1,800 pictures have been taken.
The Coolpix 8400 offers something called Best Shot Selector (BSS), which is available in Programmed-Auto, Aperture-priority, Shutter-priority, and Manual modes. When BSS is enabled, the camera will take up to ten pictures while the shutter button is held down. The camera then compares the pictures and saves only the one with the highest level of sharpness and detail. This feature can be very useful when taking pictures in low light where camera shake can cause blurry pictures. It is also recommended in Macro mode and when taking telephoto shots. Under the BSS menu option, there is another setting called "Exposure BSS". With Exposure BSS, the camera will take five pictures each time that the shutter button is pressed. There are three sub-options under Exposure BSS: Highlight, Shadow, or Histogram BSS. Each of these options allows you to use BSS in a different way. For example, Highlight BSS will select the image with the least amount of overexposed areas. Shadow BSS will select the image with the least amount of underexposed areas. Finally, Histogram BSS will select the image with the least amount of overexposed and underexposed areas.
The "User setting" option allows you to save changes to camera settings to one of 2 memory banks. By default, all camera settings are saved to the first user bank. This feature is useful if there are two people sharing the same camera or if you are frequently changing between two types of shooting situations.
| Menu (2/3) | |
| Image mode | Image quality, Image size |
| Sensitivity | Auto, 50, 100, 200, 400 |
| Image sharpening | Auto, High, Normal, Low, Off |
| Lens | Normal, Wide adapter, Telephoto, Fisheye |
| Exposure options | AE lock (Off, On, Reset), Bulb/Time (Bulb release, Timed release) |
| Focus options | AF area mode (Auto, Manual, Off), Auto-focus mode (Single AF, Continuous AF), Focus confirmation (Manual focus, On, Off) |
| Zoom options | Digital tele (On, Off), Fixed aperture (On, Off) |
The Sensitivity option lets you control the camera's sensitivity to light. The options are ISO 50, 100, 200, and 400. The Lens options are to be used when an adapter lens is being used on the camera. When the exposure option AE lock is enabled, the camera will lock the exposure and white balance setting so that each subsequent picture will use the current settings. This can be helpful when taking pictures for a panorama for example. The Bulb/Time options allow you to specify what happens when Bulb/Time is selected in Manual mode. If Bulb release is selected, the shutter will remain open for as long as the shutter button is held down. If Time release is selected, the shutter will stay open for a preset time of 0.5, 1, 3, 5, or 10 minutes.
 Auto AF area, locked |
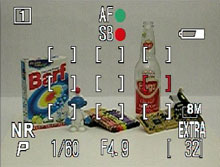 Manual AF area, locked |
The Coolpix 8400 offers several auto-focus options. If the AF area mode is set to Auto, the camera will select one of 5 focus points automatically when the shutter button is half-pressed. If Manual is selected, one of 9 AF points can be selected with the arrow pad. When the AF area mode is set to "Off", the camera will always use the center focus point. However, there is a benefit to turning AF area mode off. After selecting the "Off" option, you can choose between "Hybrid AF" and "Standard AF". The advantage of Hybrid AF is that the camera uses its ranging sensor to estimate the distance to the subject even before the shutter button is pressed. The ranging sensor works in combination with the contrast detection method to provide faster focusing. The Coolpix 8400 also has an AF-assist lamp that illuminates the subject automatically to aid in focusing if there is not enough ambient light available.
In Programmed-Auto, Shutter-priority, Aperture-priority, Manual, and Movie recording modes, the 8400 can be set to manual focus. To do this, the Focus button must be pressed while rotating the Command dial. At this point, the Focus button can be released and the Command dial can be rotated left and right until the subject appears in focus.
For the Auto-focus mode, you can choose between Single AF or Continuous AF. With Single AF, the camera locks focus when the shutter button is half-pressed. When Continuous AF is selected, the camera will focus on its own. When the shutter button is half-pressed, the camera will lock focus. Focus Confirmation is an interesting option. When it is enabled, the objects that are in focus will appear with sharp edges to let you know that they are in focus. If "Manual focus" is selected, the camera will only show these edges when focusing manually. Under Zoom options, the "Digital tele" setting refers to the digital zoom. If On is selected, the digital zoom can be enabled by continuing to hold the telephoto side of the zoom controller after the optical zoom has reached is limit. If "Fixed aperture" is enabled, the camera will keep the aperture as close as possible to the selected value in both Aperture-priority and Manual shooting modes.
| Menu (3/3) | |
| Speedlight options | Pop Up (Auto, Manual), Flash exposure compensation (+/- 2 stops in 1/3 stop increments), Speedlight control (Auto, Internal off) |
| Auto bracketing | Off, Auto bracketing (3 or 5 shots, +/- 0.3, 0.7, 1.0), WB bracketing |
| Noise reduction | On, Off |
| Reset | No, Reset |
| My menu | Setup |
| CF card format | No, Format |
The Speedlight options allow you to control the behavior of both the built-in and optional flashes. If Pop Up is set to Auto, the camera will release the pop-up flash automatically when it is needed. If this option is set to Manual, the flash must be released manually by pressing the Flash Mode button on the top of the camera. With the Flash exposure compensation setting, a compensation of +/- 2 stops in 1/3 stop increments can be applied to the flash. If the Speedlight control setting is set to Auto, the camera will use the optional Speedlight if it is attached. Otherwise, the camera will use the built-in flash. The setting "Internal off" will disable the built-in flash. The Auto bracketing option allows you to take either 3 or 5 pictures with the following variations: +/- 0.3, 0.7, 1.0. For example, if "3 +/-1.0" is selected, the first shutter release will take a picture with no compensation applied. The next shutter release would take a picture with +1.0 EV applied. Finally, the third picture would have -1.0 EV applied. If Continuous is selected as the current drive mode, the camera will take all three pictures in a row while the shutter button is held down. The WB bracketing option is similar except instead of varying the exposure, it varies the white balance. With WB bracketing, the camera records three pictures each time that the shutter button is pressed. The first picture is normal followed by a picture with a reddish cast and a picture with a bluish cast.
With Noise reduction on, the camera attempts to remove noise from images taken at shutter speeds 1/4th sec. or slower. The Reset option will restore the current user memory bank to the factory default settings. The settings in the other user bank will remain unchanged. With the "My menu" option, you can specify which 6 of the 20 menu items to display when the Menu button is pressed. You can also specify in what order you want them to appear. In order to see all 20 menu items, you must select "Show all menus" from the bottom of the "My Menu" display. Finally, the "CF card format" option allows you to format the flash card.
In Movie mode, the Coolpix 8400 records video with audio at 640x480 (30 fps) or 320x240 (15 fps) as QuickTime MOV files. When recording at 640x480, the length of a video clip is limited to 60 seconds. However, at 320x240, the video length is only limited by the remaining flash card space. At the 320x240 size, the video can be in full color, sepia, or black and white. There is also an option to record a time-lapse movie with interval options of 0.5, 1, 5, 10, 30, and 60 minutes. Under the time-lapse menu, you can choose to enable AE lock as well. The Auto-focus mode can be set to either Single AF or Continuous AF via the Menu button. Finally, the 8400 offers an option called Electronic VR (Vibration Reduction), which can be enabled or disabled. While recording, the optical zoom is disabled. However, the digital zoom is available.
The final position on the mode dial that we must discuss is Setup mode. Setup mode consists of three "pages" of options that pertain to camera operation. Below, we have outlined these options in three separate tables:
| Set-up (1/3) | |
| Language | Select |
| Date | Date/Time, Time Zone |
| Folders | Folder options (New, Rename, Delete), Select |
| Monitor options | Release speed (Normal, Quick response) Review options (On, Off) Brightness (5 levels) Hue (11 levels) Start-up display (Monitor On, Viewfinder On) Welcome screen (Disable, Nikon, Select) |
| Seq. numbers | On, Off, Reset |
| Shutter sound | On, Off |
| Auto off | 0.5, 1, 5, 30 min. |
The Folder option allows you to create and name new folders or rename and delete existing folders. In addition, you can select which folder the camera should use to record and display images. The Monitor option category contains several settings for adjusting the appearance of images on the LCD/viewfinder display. According to the user's guide, a slight decrease in shutter lag can be gained by enabling "Quick response". The Quick response option places priority on speed instead of the preview image quality (the recorded image quality is unaffected). The Review setting refers to whether or not the camera displays a brief review of the image immediately after it is taken in Programmed-Auto, Shutter-priority, Aperture-priority, and Manual modes. In all other still recording modes, a review is displayed automatically. The Start-up display option allows you to specify whether the LCD monitor or the viewfinder should turn with the camera. With the Welcome screen option, you can enable/disable the default Nikon display or select a custom image for display at startup. The "Seq. numbers" option allows you to adjust the way in which the 8400 numbers its files and folders. If On is selected, the camera will use sequential file numbers for all new folders and images, even if a new card is inserted or the current card is formatted. If Off is selected, the camera will start with "0001" if a card is formatted, a new folder is created, or a new card is inserted. If Reset is selected, the camera will restart its numbering scheme at "0001". "Auto off" refers to the amount of the time the camera will wait before entering standby mode if no buttons are pressed.
| Set-up (2/3) | |
| CF card format | No, Format |
| Controls | Func (User setting, White balance, Image quality, Image size, Sensitivity, Continuous) , "AE, AF-L" (AE-L&AF-L, AE-L, AF-L) |
| Shot confirmation | On, Off |
| Info.txt | On, Off |
| USB | PTP, Mass storage |
| Video mode | NTSC, PAL |
| Reset all | No, Reset |
With the Controls option, you can specify a frequently used menu to appear when the Func button is pressed. The "AE, AF-L" option lets you specify the behavior of the AE/AF-L button. With Shot confirmation enabled, the self-timer lamp will illuminate to indicate the shutter has been released. If the Info.txt option is enabled, the camera will create a text file with details of each image such as shutter speed, aperture, metering, etc.
| Set-up (3/3) | |
| Date imprint | Off, Date, Date and time |
| Firmware version | Ok |
With the date imprint option, the camera will imprint the date or date/time on each picture in the lower right corner. The Firmware version option simply displays the current firmware. We are using version 1.2.
Playback Features
Quick review
To review previously taken pictures, you can either rotate the mode dial to Play or press the Quick review button while in a recording mode. If you press the Quick review button in a shooting mode, a small version of the last picture taken will appear in the upper left corner of the screen. Another press of the Quick review button will switch to a full screen version of the picture.
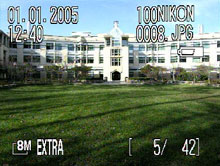 Image regular view |
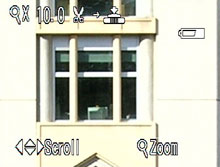 Image magnified 10x |
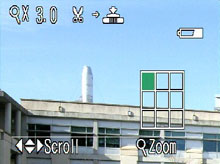
Quick zoom 3x
In the full screen review, you can magnify an image up to 10x. To do this, simply use the zoom controller to zoom in and out of the image. You can move to different areas of the image by using the multi-directional arrow pad. In addition, the 8400 offers a quick zoom mode that can be enabled by pressing the "enter" button. The image will be magnified 3x automatically. A grid will appear in the lower right indicating the area of the image in which you are currently viewing.
The 400 offers a "quick edit" option, which allows you to crop a JPEG image at anytime by pressing the shutter release button. For example, if you want to save a cropped version of an image, simply frame it the way you want it on the monitor/viewfinder by magnifying and panning. Then, press the shutter release button to save a copy of the image as you framed it. In Play mode, if the shutter release button is pressed while viewing an image full screen, one of two dialogs will appear. If you are viewing a JPEG image, a dialog will appear with two options: "Small pic." and "D-Lighting". The "Small pic." option allows you to save an image as a smaller picture. The exact size that it will use can be set in the menu. As explained in the user's guide, Nikon recommends using "D-Lighting" for images that need extra contrast or to brighten dark or back-lit subjects. If the image that you are viewing is a RAW file, pressing the shutter release button will bring up the option to convert the image to a TIFF file.
 2x2 thumbnail |
 3x3 thumbnail |
When viewing an image at its original full screen size, pressing the wide angle side of the zoom controller will change the screen to a 2x2 thumbnail view. Another press will change the screen to a 3x3 thumbnail view. In the thumbnail views, the arrow pad can be used to highlight a picture. Then, the "set" button is used to view the image full screen. To skip through pictures a page at a time, you can rotate the Command dial left or right. To delete an image, you must press the Delete/Self-timer button. An image can be erased from full screen or thumbnail views. From Quick View mode, you can press the Quick review button again or half-press the shutter button to return to shooting.
 |
 |
 |
 |
 |
 |
In both Quick Review and Play modes, there are 6 different displays of information available to the user. To cycle through these different information screens, the Command dial can be rotated left or right. In the 5th display, the thumbnail image flashes in highlight areas.
During playback in Play mode or full screen Quick review, a voice memo can be recorded by holding the Exposure compensation/Voice memo button. Voice memos are limited to 20 seconds and are recorded as WAV files with the same file number as the image. To delete a voice memo, simply press the Delete button and select the music icon.
The main difference between Quick review mode and Play mode is that in Play mode, the user has access to the menu options. The Playback Menu offers 2 "pages" of options outlined below:
| Playback Menu (1/2) | |
| Delete | Selected images, Erase all images |
| Folders | Folder options (New, Rename, Delete), Select |
| Slide show | Start, Frame interval (2, 3, 5, 10 sec.), Loop |
| Protect | Select |
| Hide image | Select |
| Print set | Print selection (Select), Delete print set |
| Auto transfer | Selected images (Select), All images, Cancel transfer |
In Play mode, you can choose to delete selected images or to erase all images on the flash card. There is a slide show feature that allows you to pick the length of time to display each picture as well as whether or not to loop the show. The Protect option lets you select images to mark as "protected". When images are protected, they cannot be deleted. However, they will be erased if the flash card is formatted. "Hide image" is an interesting option that allows you to select the images that you would like to hide from view during playback. This can be especially useful when arranging a slideshow of specific images. The Print set option allows you to print images when the camera is connected to a DPOF (Digital Print Order Format) compatible printer. "Auto transfer" lets you mark specific images or to select all images to be transferred automatically when the camera is connected to a computer.
| Playback Menu (2/2) | |
| Move image | Move |
| CF card format | No, Format |
| Small pic. | 640x480, 320x240, 160x120 |
With the "Move image" function, you can move images from one folder to another on the same flash card. The "Small pic." setting will determine the size of the new image when selecting the "Small pic." option (by pressing the shutter release button while viewing a JPEG file).
Battery Performance
Our general method for battery testing is to reset the camera to its default settings and change the recording mode to the highest quality option (RAW). Then, we take 5 pictures without the flash and 2 pictures with the flash until the battery is dead. For more information on our battery test, please refer to our Testing Procedures page. For this test, we used the supplied EN-EL7 Li-ion rechargeable battery. The battery was fully drained before charging for the test.| Number of shots taken in one battery charge |
| 347 |
The Coolpix 8400 was able to take 347 RAW 8MP frames on a single charge. Although the 8400 did not perform as well as we expected, the battery should certainly last through a day of moderate shooting. Unfortunately, with proprietary batteries such as the EN-EL7, it will cost around $40 to purchase a spare battery to avoid downtime during intense shooting sessions.
The Timing Tests
NOTE: For all of our time tests, the camera is reset to its factory default settings and set to record using the highest resolution and quality setting (JPEG). It is set to record in Auto mode. All sounds were disabled. We used a Sandisk Ultra II 512 MB CompactFlash card.Before reading our results, please refer to our Testing Procedures page.
Startup Time
The startup time is recorded from the moment that the power button is pushed to the moment that the shutter sounds. The camera is set to record in Auto mode.| Time (seconds) | |
| Welcome screen enabled | 4.77 |
| Welcome screen disabled | 4.31 |
When the "Welcome screen" was enabled, the Coolpix 8400 took a time of 4.77 seconds to start up and take a picture. By disabling the "Welcome screen", the camera is able to start up in a faster time of 4.31 seconds. We are not terribly impressed with either of these times. They are a bit longer than average for cameras with extending lenses.
Shutter Lag
To record shutter lag, we perform two tests. For the first test, we pre-focus the lens and measure the amount of time that it takes the camera to take a picture after the shutter button is pressed. The second test measures the time that it takes for the camera to take a picture after we press the shutter button without pre-focusing. Each test is performed 3 times and the results are averaged. For more information regarding our testing procedures, please refer to our Testing Procedures page.| Pre-focused Lag (seconds) |
| 0.07 |
| Full Shutter Lag | |
| Hybrid AF/Quick Response | Time (seconds) |
| Off/Off | 0.72 |
| Off/On | 0.49 |
| On/On | 0.53 |
| On/Off | 0.56 |
When we pre-focused the camera, the shutter lag was an impressive 0.07 sec. Given the numerous possibilities for variations in full shutter lag, we ran 4 tests. With each test, we either had the Auto AF area mode On or Off. When Auto area mode is On, the hybrid AF is disabled automatically. In addition, we altered the Quick Response setting in the Set-up menu to measure the effect. As you might expect, the slowest time was when we disabled both the Hybrid AF and Quick Response (0.72 sec.). The rest of the times were fairly close between 0.49 and 0.56. As the numbers indicate, the Coolpix 8400 has the least lag when the Quick Response option is enabled. We recommend turning the Quick Response option on and sacrificing the difference in the quality of the live preview (the actual image quality is unaffected).
Write Times
We recorded 5 different write times with a Sandisk Ultra II 512 MB CompactFlash card:Single Shot - The time that it takes for a single picture to be completely written to the flash card.
Shot To Shot (STS) - The time until the second shot can be taken after the first (shutter to shutter).
Shot To Shot w/Flash - The time that it takes the camera to take two pictures with the flash, starting from the moment that the first flash is fired to the moment that the second is fired.
Shot To Shot w/Buffer Full - The time between taking the last shot of a continuous burst to the moment that the shutter sounds again.
Clear Buffer - The time that it takes the camera to clear the buffer after a full burst of pictures is taken.
* Because the Coolpix 8400 does not have an activity light, the "Single Shot" and "Clear Buffer" times were recorded starting from the close of the last shutter and ending with the disappearance of the card icon.
We performed each test three times and averaged the results. Below are the resolution, quality setting, and average file size used for the tests.
| Resolution (pixels) | Quality setting | Avg. file size (MB) | |
| JPEG | 3264x2448 | EXTRA | 5.73 |
| TIFF | 3264x2448 | HI | 22.89 |
| NEF | 3264x2448 | RAW | 12.00 |
| Single Shot | Shot To Shot | Shot to Shot w/Flash | Shot to Shot w/Buffer Full | Clear Buffer | |
| JPG | 5.16 | 2.51 | 8.50 | 5.47 | 22.17 |
| TIFF | 17.85 | 18.18 | 21.32 | N/A | N/A |
| RAW | 14.81 | 8.54 | 18.56 | 40.81 | 68.47 |
With the highest quality JPEG setting, the Coolpix 8400 takes 2.51 seconds between shots. By the 5th shot, the camera slows to 4.90 seconds between shots. When the flash is used, the camera needs 8.50 seconds between shots. In Continuous H mode, the camera can shoot 5 frames at 2.77 fps before slowing to 5.47 seconds between shots. To fully clear the buffer of 5 frames, it takes 22.17 seconds.
Given the enormous size of TIFF files, we were not too surprised by the 18.18 seconds required between each shot. When the flash is enabled, this cycle time slows to 21.32 seconds. In RAW mode, the camera needs 8.54 seconds between each shot and 18.56 seconds between flash shots. In Continuous H mode, the 8400 can capture 5 RAW frames at 2.71 fps before slowing to 40.81 seconds between shots. To clear the entire buffer of 5 frames, it takes 68.47 seconds.
In general, we weren't really impressed with the cycle times of the 8400. Even a shot-to-shot speed of 2.51 seconds in JPEG mode isn't very good; we really expected a faster cycle time with the JPEG setting. Finally, the Continuous H mode is relatively decent at ~2.7 fps. However, with the time that it takes to clear the buffer (especially in RAW mode), the usefulness of the burst mode is diminished.
Resolving Fine Lines
For our resolution test, we reset the camera to its default settings and then used the highest resolution and quality setting. For more information, refer to our Testing Procedures page. When reading this chart, the numbers represent lines per picture height (LPH). For example, the number 16 would represent 1,600 LPH. Below are 200% crops of the test. Click here to download the original TIFF file (WARNING: File is 23 MB!). Click on a crop below to see a JPEG version of the chart.
+1.3 EV
Click to enlarge.
In the horizontal crop above, the Coolpix 8400 puts in a great performance resolving lines out until 1,650 LPH. There is some discoloration that begins to appear around 1,600 LPH and continues until the end of the test pattern.
+1.3 EV
Click to enlarge.
In this vertical crop, the 8400 is able to resolve lines out until 1,700 LPH before moving to extinction around 2,000 LPH. Again, we can see a bit of discoloration appearing around 1,600 LPH. Overall, we are very impressed with the high resolving power of the Coolpix 8400.
Color Reproduction
For all of our color tests, we reset the Coolpix 8400 to its factory default settings. It was then set to record using the highest image quality option (JPEG). All images are in sRGB color space.We took a picture of our color chart using each of the following WB settings: Auto, Incandescent, and Manual. Click on a thumbnail below to view the full-size image.
Incandescent WB
| Auto WB | Incandescent WB | Manual WB |
 Click to enlarge. |
 Click to enlarge. |
 Click to enlarge. |
 Reference Chart ("actual colors") |
||
| Auto WB | Incandescent WB | Manual WB |
 |
 |
 |
When set to Auto WB in tungsten lighting, we were not surprised to see that the Coolpix 8400 produces a slight yellowish-orange color cast on the color chart. However, we should mention that the 8400 is a bit more accurate than most digicams with Auto WB. When we set the camera to Incandescent WB, the chart is noticeably more accurate. However, we still detected a bit of a yellowish cast. With Manual WB, the color reproduction was extremely accurate.
Daylight WB
| Auto WB | Daylight WB | Manual WB |
 Click to enlarge. |
 Click to enlarge. |
 Click to enlarge. |
| Reference Chart ("actual colors") |
||
| Auto WB | Daylight WB | Manual WB |
 |
 |
 |
In daylight, the Coolpix 8400 put in a very impressive performance. With all three WB settings, the camera produced bright and very accurate color charts.
Studio Shot
In this shot, we tested the camera's ability to reproduce colors in our studio shot using different WB settings.| Auto WB | Tungsten WB | Manual WB |
 Click to enlarge. |
 Click to enlarge. |
 Click to enlarge. |
In our studio shot samples, the Auto WB setting actually produced slightly more accurate colors than the Tungsten WB setting, although both have a slight yellowish-orange cast. The Manual WB setting produced very accurate colors.
Built-in Flash
For the flash test, we set the camera to Auto mode w/Auto flash. The picture was taken from 5 feet away.
Click to enlarge.
The 8400 proved capable of producing very accurate colors in our flash test. We found no sign of a color cast in this sample. The color saturation is fairly conservative right out of the camera.
Noise
The noise test consists of pictures of our studio shot taken at increasing ISO levels to show the effect on the image. The pictures were taken after resetting the camera to its factory default settings. The camera is then set to record with the highest quality JPEG option with manual WB. Click on a 100% crop below to view the full-size image.| ISO 50 |  Click to enlarge. |
| ISO 100 |  Click to enlarge. |
| ISO 200 |  Click to enlarge. |
| ISO 400 |  Click to enlarge. |
In this noise comparison, we can see that the Coolpix 8400 does a good job of handling noise from ISO 50 to 200. At ISO 400, the noise becomes much more noticeable and there is a significant loss of detail. In addition, we can see the introduction of discolored pixels throughout the noise image.
General Image Quality
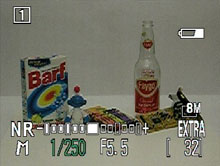
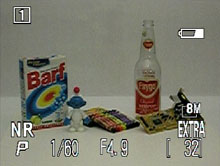
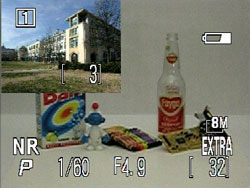
For these pictures, the camera was reset to its factory default setting. Then, it was set to its highest quality JPEG recording setting. Unless stated otherwise, the following settings were used: Auto WB, Matrix metering, Auto image adjustment, Normal saturation, Sensitivity ISO 50, Normal image sharpening, Auto AF area mode, and Noise reduction enabled. Portrait-style images have been rotated using Irfanview's "lossless operations". Click on a thumbnail to view the full-size image. The crops below the thumbnails are 100%. All images are in sRGB color space.  (f/5.7, 1/250 sec.) Click to enlarge. |
 (f/6.4, 1/250 sec.) Click to enlarge. |
 (f/5.1, 1/180 sec.) Click to enlarge. |
 |
 |
 |
In the first two images above, the Coolpix 8400 proves it can capture a very high level of detail. However, we cropped out a small 100% portion of both images that show subtle jaggies along diagonal lines. Although the jaggies are not too strong, we were surprised to see these at all in the highest quality JPEG mode. In the third image, we have cropped out a small portion of the image where the 8400 has mildly overexposed the subject.
 (f/2.6, 1.4 sec.) Click to enlarge. |
 (f/5.1, 1/160 sec.) Click to enlarge. |
 (f/5.1, 1/180 sec., Macro scene) Click to enlarge. |
 |
 |
 |
In the fourth picture above, we have highlighted something that we saw in a number of the images that we took. It seems that sometimes the 8400 will blur details near the edges/corners of the frame. In the fifth sample, we are impressed to see that this camera is "purple-fringe free". Even in pictures where cameras are usually prone to display purple-fringing, the 8400 shows superb control. In the final image, the camera proves capable of taking very detailed and vibrant macro shots. With all of these images, at the default "normal" sharpening, they are a little soft straight out of the camera. This is preferable for people who plan to post-process the images in order to have more control over sharpening, contrast, etc.
In general, we are very impressed with the image quality of the 8400. The camera displays no sign of chromatic aberrations and captures images with a very high level of detail. The only problems that keep image quality from being outstanding are the mild blurring in the edges/corners of the frame and the very slight jaggies that we had detected. We also should mention that the built-in red-eye reduction worked extremely well for us. Not once did any of our pictures suffer from red-eye, even in circumstances where it is commonly a problem (low-light and large pupils).
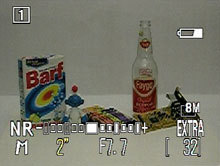
RAW VS. JPEG
We wanted to compare the difference in image quality between JPEG/Extra and RAW. However, we ran into a problem when trying to export NEF files with the bundled PictureProject software. The application would simply crash whenever we tried to convert the file. Therefore, we converted the NEF files to TIFF in the camera. Below is a comparison of an image in both JPEG/Extra and RAW (converted to TIFF). Click here to download the original TIFF file (WARNING: TIFF file is 23 MB!).| JPEG | RAW |
 Click to enlarge. |
 Click to enlarge. |
 |
 |
We found it very difficult to see any differences between the two images. At most, there appears to be a touch higher saturation in the JPEG image. This says quite a bit for the ability of the JPEG/Extra setting. It is unfortunate that RAW conversion (via PictureProject) appears to be unavailable at this time. We expect that Nikon will issue an update to address this problem.
Night Landscape (Scene mode)
 (f/2.6, 2 sec., ISO 50, Tungsten WB) Click to enlarge. |
 |
In this image taken in Night Landscape Scene mode w/Noise reduction, we can see that the 8400 is capable of producing crisp, low-noise, long exposures. When this image was taken with Auto WB, there was a strong yellowish/orange cast from the tungsten lights on both sides of the building. The 8400 can be set for a timed exposure of up to 10 minutes and can be set to "bulb" longer exposures.
Movie Mode
 (320x240, 15 fps, VR disabled) Click to view. |
 (320x240, 15 fps, VR enabled) Click to view. |
The two video clips above were recorded to demonstrate an audio sync problem that occurs when the VR (vibration reduction) option is disabled. In the first clip, we can see that there is a small delay in the audio. When we enabled VR for the 2nd clip, the audio sync problem disappeared. Although we expect that this problem will be addressed in a future firmware update, it is an important point to note.

(640x480, 30 fps, VR enabled)
Click to view.
The image quality of Movie mode is very impressive at 30 fps. It is unfortunate that at 640x480, the 8400 limits you to only 60 seconds of video. In addition, we were disappointed to see that the black & white and sepia options are only available for the 320x240 resolution. The optical zoom is disabled during recording, but the digital zoom can be utilized.
Final Words
All in all, the Nikon Coolpix 8400 has quite a bit to offer. The camera has a solid, well-constructed body in a conveniently portable size. As the widest angle digicam currently on the market, it can shoot images at 24 - 85 mm with an 8 megapixel resolution. The 8400 has all the recording modes that we expect from modern advanced digicams including full Auto, Programmed-Auto, Shutter-priority, Aperture-priority, Manual, Scene, and Movie.During our review, we discovered that the 8400 puts in an impressive resolution performance. In addition, the Auto WB system performs better than most digicams that we've tested thus far. In daylight, the Auto WB system is extremely accurate. In our general image quality samples, the 8400 appears to be immune to purple fringing. Also, when we compared a raw TIFF image to a JPEG/Extra image, we were hard-pressed to see any substantial differences. This is significant because the downfall of many digicams is their over-compression of JPEG files, resulting in unsightly artifacts. Other good points about the camera were its decent battery performance and very effective built-in red-eye reduction. In addition, we were fairly impressed with the 8400's shutter lag times.
However, we also discovered some negative points during our testing. The camera took a longer-than-average 4.3 seconds (best case) to power up and take its first shot. Also, we were surprised at the generally slow cycle times of this camera. The fastest cycle time was 2.5 seconds between JPEG/Extra frames. When the flash was enabled, this time slowed to 8.5 seconds. Of course, in RAW and TIFF modes, these times were significantly slower. Clearly, this camera was not designed with speed as a top priority. Although it was not a major problem, we did notice the appearance of very mild jaggies on some of our sample images. Also, in some of our samples, we found that there was some blurring near the edges/corners. With the bundled PictureProject software, we discovered that the application would crash whenever we tried to export from a RAW file. In movie mode, we also noticed an audio lag when VR (vibration reduction) was disabled.
Despite the shortcomings of the Coolpix 8400, we are impressed with its overall performance. All of our sample images taken with the camera were evenly exposed with high detail and accurate color reproduction. For someone looking for a high-quality wide angle solution to meet their photography needs, the 8400 will most likely fill the position so long as speed is not the largest factor.
| Pros | Cons |
| - Great resolution performance - Very wide angle lens - Decent Auto WB (very good in the sun) - Good shutter lag times No purple fringing - "Extra" setting offers low compression JPEG - Decent battery life Unlimited movie duration at 320x240 - Excellent in-camera red-eye reduction |
- Slightly below average startup time - Slow Shot to Shot w/Flash time - Generally unimpressive cycle times - Slight jaggies visible in some images - Blurring at edges/corners - Audio lag in movie mode with VR disabled - Movies limited to 60 sec at 640x480 Could not convert RAW files with software |
Thanks again to Newegg.com for loaning us the Nikon Coolpix 8400 for review.


