Original Link: https://www.anandtech.com/show/1498
The Hunt for the Best Ultra-Compact Camera
by Stephen Caston on October 5, 2004 12:05 AM EST- Posted in
- Digital Camera
Index
Product Samples provided by Newegg.com.These days, many people are searching for the perfect ultra-compact digital camera. At the same time, camera companies are continually finding ways to increase the pixel output while decreasing camera size. This leads to a vast array of small cameras that are becoming more and more affordable. Today, we take a look at three recently released ultra-compact cameras: Canon PowerShot S410, Casio Exilim Ex-Z40, and Pentax Optio S40. They share a similar size along with a 3x optical zoom and 4 megapixel output.
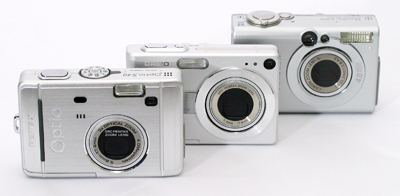
All three of these cameras are popular choices for small camera enthusiasts. In our roundup, we are going to take some of the guesswork out of your hunt for the best ultra-compact camera.
Specifications
| Canon PowerShot S410 | Casio Exilim Z40 | Pentax Optio S40 | |
| Release Date | February 2004 | February 2004 | February 2004 |
| Price | ~$300 - $350 | ~$330 - $400 | ~$250 - $300 |
| Pixel Count | 4.0 Million | 4.0 Million | 4.0 Million |
| Camera Type | Ultra-compact | Ultra-compact | Ultra-compact |
| Highest Resolution | 2272x1704 | 2304x1728 | 2304x1728 |
| Lower Resolutions | 1600x1200, 1280x960, 640x480 | 2304x1536 (3:2), 1600x1200, 1280x960, 640x480 | 2048x1536, 1600x1200, 1280x960, 640x480 |
| Sensor Type | CCD | CCD | CCD |
| Sensor Size | 1/1.8" | 1/2.5" | 1/2.5" |
| LCD Screen Size | 1.5" | 2" | 1.6" |
| Optical Zoom | 3x; 36 - 108mm equivalent | 3x; 35 - 108mm equivalent | 3x; 35 - 105mm equivalent |
| Focus Range | 18" - Infinity | 15.8" - Infinity | 15.7" - Infinity |
| Macro | 2.0" | 2.4" | 2.4" |
| Digital Zoom | 3.6x | 4x | 2.6x |
| Lens Thread | Fits accessory lenses and filters | None | None |
| Auto Focus | Yes | Yes | Yes |
| Auto Focus Type | TTL | TTL, Contrast-detection | TTL, Contrast-detection |
| Manual Focus | No | Yes | Yes |
| AF-lamp | Yes | No | No |
| Maximum Aperture | W: f2.8; T:4.9 | W: 2.6; T: 4.8 | W: 2.6; T: 4.8 |
| Shutter Speeds | 15 - 1/2000th sec. | 4 - 1/2000th sec | 4 - 1/2000th sec |
| ISO | Auto, 50, 100, 200, 400 | Auto, 50, 100, 200, 400 | Auto, 50, 100, 200, 400 |
| Flash | Built-in | Built-in | Built-in |
| Flash Range | W: 1.5 - 11'; T: 1.5 - 6.6' |
W: 1.6 - 11.5'; T: 1.3 - 5.9' |
W: 0.6 - 11.5'; T: 0.6 - 6.6' |
| Flash Compensation | None | None | None |
| Exposure Compensation | +/- 2 stops in 1/3 increments | +/- 2 stops in 1/3 increments | +/- 2 stops in 1/3 increments |
| White Balance | Auto, Daylight, Cloudy, Tungsten, Fluorescent, Fluorescent H, Manual | Auto, Sunlight, Overcast, Shade, Light bulb, Fluorescent, Manual | Auto, Daylight, Shade, Tungsten, Fluorescent, Manual |
| Bracketing | None | None | None |
| Metering | Evaluative, Center-weighted, Spot | Multi-pattern | Multi-segment, Center-weighted, Spot |
| Color Space | RGB | RGB | RGB |
| Aperture Priority | No | No | No |
| Shutter Priority | No | No | No |
| Manual Exposure | No | No | No |
| Continuous Drive | Yes, rated at 2.5 fps; capable of 2.8 fps for 3 frames (2272x1704, Superfine) | None | Yes, 0.6 fps for unlimited frames (2304x1728) |
| Self-Timer | Yes, 10, 2 sec. | Yes, 10, 2 sec. | Yes, 10, 2 sec. |
| Storage Method | CompactFlash (Type I) | SD/MMC, Internal | SD, Internal |
| Storage Included | 32MB CompactFlash | 9.7MB Internal | 11MB Internal |
| Compressed Format | JPG | JPG | JPG |
| Uncompressed Format | None | None | None |
| Quality Settings | Superfine, Fine, Normal | Fine, Normal, Economy | Superior, Super, Normal, Economy (Easy mode) *, **, *** (other modes) |
| Video clips | 320x240, 160x120, 15 fps, w/sound, AVI, up to 3 mins. | 320x240, 15 fps, w/sound, AVI, unlimited duration | 320x240, 30 fps, w/sound, AVI, unlimited duration |
| Battery Type | NB-1LH Lithium-Ion Rechargeable | NP-40 Li-Ion Rechargeable | 2 AA Ni-MH/Alkaline, CR-V3 |
| Charger Included | Yes | Yes, cradle | No |
| PC Interface | USB | USB, cradle | USB |
| TV-out | Yes | No | Yes |
| Tripod Mount | Yes, metal | Yes, metal | Yes, plastic |
| Weight (with battery and card) | 7.9 oz. | 5.3 oz. | 6.2 oz. |
| Dimensions | 87 x 57 x 27.8 mm | 87 x 57 x 23 mm | 89 x 58.5 x 25.5 mm |
| Included in the Box | ||
| Canon PowerShot S410 | Casio Exilim Z40 | Pentax Optio S40 |
The Design: Canon PowerShot S410

Click to enlarge.
The front of the Canon PowerShot S410 houses its lens, which is capable of a 3x optical zoom of 36 - 108mm (35mm equivalent). The lens has a maximum aperture of f2.8 at wide angle and 4.9 at telephoto with a shutter speed range of 15 - 1/2000th sec. When the power button is pressed, the built-in lens cover opens and the lens extends automatically. Directly above the lens is the multi-purpose AF-assist/Red-eye reduction/Self-timer lamp. To the left of this lamp is the viewfinder window. In the upper-right corner is the built-in flash with a working range of 1.5 - 11' in wide angle and 1.5 - 6.6' in telephoto.

Click to enlarge.
The LCD monitor on the S410 is 1.5" with approximately 118,000 pixels. Below the monitor are 4 control buttons: Set, Menu, Display, and Function. The Function button also serves as the "Single Image Erase" button. To the right is a 4-way controller. Each directional button serves one or more purposes in addition to navigating through the menus. The up arrow selects the metering mode, while the down arrow changes the drive mode from Single to Continuous or Self-timer. The left arrow chooses between Macro and Infinity while the right arrow selects the flash mode from the following options: Auto, Auto w/Red-eye reduction, Flash on, Flash off, and Slow synchro. Just to the right of these arrow buttons is the Print/Share button.
Above the LCD monitor are the Mode Dial, two indicator lamps, and the viewfinder. On the right side is the Mode Switch that toggles the camera between Play and Record mode. Just below the Mode Switch is the release switch for the spring-action CompactFlash door.

Click to enlarge.
The speaker and microphone are located on the left side here. To the right is the camera's main power button. Just above the power button is an indicator lamp that stays lit whenever the camera is on. On the far right is the shutter button. Surrounding the shutter button is the Zoom lever that controls the cameras zoom capability in record mode as well as the magnification of images in playback mode.
 Click to enlarge. |
 Click to enlarge. |
To open the battery compartment on the S410, you simply slide the hinged door and pull it back. The rechargeable Li-ion battery that comes with the camera is the NB-1LH 3.7 840mAh. We should also mention that there is a movable rubber tab on the sliding door that allows the optional AC adaptor to be used. To the right is a metal tripod mount.
 Click to enlarge. |
 Click to enlarge. |
On the right side is the spring-action door that reveals the slot for Type I CompactFlash cards. There is also a post for the wrist strap.
 Click to enlarge. |
 Click to enlarge. |
Here, we have a rubber tab that covers the A/V-out and USB ports.
Overall, the S410 has a fairly impressive build. Although it seems a bit heavy for its size at 7.9 oz., the weight along with its metallic casing make it feel quite sturdy.
Recording Features: Canon PowerShot S410
In all recording modes, the S410 records images as JPEG files with quality settings: Fine, Standard, or Economy. The resolution options are below:| Setting | Resolution (pixels) |
| L | 2272x1704 |
| M1 | 1600x1200 |
| M2 | 1024x768 |
| S | 640x480 |
The S410 offers 4 main recording modes: Auto, Manual, Panorama (Stitch Assist), and Movie. In Auto mode, the camera does most of the work for you and leaves only a few options to be adjusted. For example, the flash mode can be changed by pressing the right arrow key. The cycle is as follows: Auto w/red-eye reduction, Flash off, and Auto flash. The drive mode may be changed by pressing the down arrow key. The options are Single shot or Self-timer. Pressing the left arrow key toggles Macro mode on and off. The S410 is capable of focusing as close as 2" in Macro mode. Pressing the Function button gives the user the option to change the image resolution and compression.
In Manual mode, the camera grants the user access to a larger array of options. There are two additional flash options available in Manual mode: On (force), and Slow Syncro. The "On" option can be used to force the camera to use the flash. For example, you might use this if you are outdoors and you want to use the flash to fill in shadows to create a bright and well-lit image. Slow Synchro is an option that helps to create natural flash pictures in low light. First, the camera uses the flash to illuminate the subject. Then, the shutter stays open to allow ambient light in. This creates a well-balanced flash image without causing the subject to appear washed out.
Another drive option can be reached by pressing the down arrow key. In addition to Single Shot and Self-timer, there is an option for Continuous Shooting. By entering the camera's menu, you can further select between Standard and High-Speed. With Standard Continuous Shooting, the S410 is capable of taking Large/Fine images at approximately 1.5 fps. In this mode, the camera displays briefly a preview of the last image taken while you are shooting. This allows you to monitor the action on the LCD screen. In High-Speed mode, the camera is able to shoot Large/Fine images at approximately 2.5 fps. The number of images that the S410 can take will vary based on the resolution and compression used.
| Metering modes | ||
 Evaluative |
 Center-Weighted |
 Spot |
Pressing the up arrow key will cycle through three different metering modes: Evaluative, Center-weighted, and Spot. With Evaluative metering, the S410 uses several zones of the frame to measure the light in order to determine a good exposure. Center-weighted metering is when the camera measures the light in the entire frame, but gives extra weight to the center. With Spot metering, the camera measures the light in the very center of the frame.
Function menu
Pressing the Function button brings up the following additional options that are unavailable in Auto mode:
| Exposure Compensation | +/- 2 stops in 1/3 increments |
| White Balance | Auto, Daylight, Cloudy, Tungsten, Fluorescent, Fluorescent H, Manual |
| ISO | Auto, 50, 100, 200, 400 |
| Effect | Off, Vivid, Neutral, Low Sharpening, Sepia, B/W |
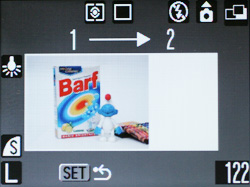
Panorama mode
In Panorama mode, the camera helps to take pictures that can later be joined using the "PhotoStitch" software provided on CD with the camera. The same Function options in Manual mode are available in Panorama mode with the exception of ISO. Also, Macro mode can be selected as well as the Flash setting (Off, Slow sync, or On).
The final position on the Mode Dial is Movie mode. The S410 offers two resolutions in which to record movie clips: 320x240 or 160x120. It records video and audio as AVI files at approximately 15 fps for up to 3 minutes. The Function menu offers Exposure Compensation, White Balance, and Effects as mentioned in Manual mode. Macro/Infinity and Self-timer are options as well. The Self-timer can be set to record after 10 or 2 seconds. In Movie mode, the focus is set when you begin recording and cannot be adjusted. The same applies for optical/digital zoom.
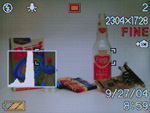
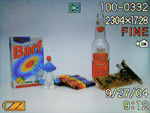
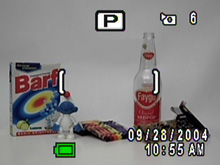
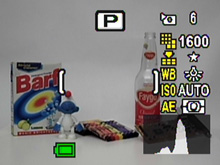
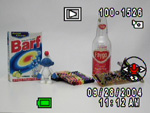
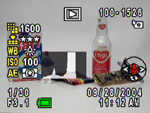
 Info |
 No Info |
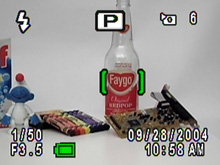
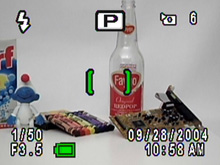
Pressing the Display button in either Auto or Manual mode causes the LCD screen to cycle through the following options: Info., LCD off, and No Info. In Panoramic mode, pressing the Display button has no effect. In Movie mode, it will toggle between a display with shooting information and a display with just the live image.
In Manual mode, pressing the Menu button brings up a full list of options. Some of these options are also available in Auto, Panorama, and Movie mode as well.
| Record Menu | |
| Quick Shot | On, Off |
| AiAF | On, Off |
| Continuous Shooting | Normal, High-speed |
| Self-timer | 10, 2 sec. |
| AF-assist Beam | On, Off |
| Digital Zoom | On, Off |
| Review | Off, 2-10 sec. |
| Long Shutter | On, Off |
| AiAF | |
 AiAF On, AF locked |
 AiAF Off, AF locked |
The Quick Shot feature allows you to take pictures faster by bypassing a full auto-focus. In the user's guide, Canon says this mode is designed for "fleeting photo opportunities". In other words, don't expect the sharpest pictures when using this setting. AiAF refers to the S410's 9-point AF system. Turning off this feature is only an option in Manual mode. When set to "On", the camera will automatically select one or more focus points in a 3x3 grid. When focus is achieved, the screen will display the focus points. When AiAF is set to "Off", a white focus box appears in the center of the frame. To shoot off center subjects in this mode, you can simply half-press the shutter button to lock focus and recompose the shot. We should also point out that this camera has the ability to perform both AEL (auto exposure lock) and FEL (flash exposure lock). To lock an exposure, you simply focus on a subject with the exposure you would like to lock. Then, half-press the shutter button and press the up arrow button. This will put an AEL icon on the screen, indicating that the lock was successful. Then, simply recompose your shot and take the picture with the pre-specified exposure. This same procedure can be used to lock the exposure with the use of a flash as well. With Long Shutter on, the S410 is able to take exposures from 1 to 15 seconds long. With shutter speeds slower than 1.3 seconds, noise reduction is automatically applied.
In record and playback mode, there is an additional menu called "Set up".
| Set Up Menu | |
| Mute | On, Off |
| Volume | Start-up, Operation, Self-timer, Shutter, Playback (each adjustable in 5 increments) |
| LCD Brightness | 15 increments |
| Power Saving | Auto Power Down: (On, Off) Display Off: (10, 20, 30 sec., 1, 2, 3 min.) |
| Date/Time | Set |
| Format | Cancel, OK |
| File No. Reset | On, Off |
| Auto Rotate | On, Off |
| Language | Select |
| Video System | NTSC, PAL |
In addition to the Set up Menu, there is a "My Camera" menu that allows the user to select a Theme, Start-up Image, Start-up Sound, Operation Sound, Self-timer Sound, and Shutter Sound.
The Canon PowerShot S410 offers a pretty basic set of recording options. We are pleased to see Canon continue to put AF-assist lamps in their ultra compact cameras. This is really something that we wish more camera companies would implement. We were also happy to see an option for long exposures. However, it is difficult to get a good exposure by guessing at the shutter speed. It would be better if the built-in light meter could determine this automatically. We would have also liked a live histogram option.
Playback Features: Canon PowerShot S410
To enter playback mode on the S410 from Record mode, you simply slide the Mode Switch to Play. If the camera is already off, pressing the On/Off button will power the camera up in playback mode without extending the lens. You can view different pictures by scrolling through them with the left/right arrow buttons. To view a thumbnail page with 9 images at a time, you can press the zoom controller to the left. Pressing the zoom controller to the left a second time will put the camera in "Jump" mode where you can skip 9 images forward or back with the press of the left/right button. No magnification |
 10x magnification |
By pressing the zoom controller to the right, you can magnify an image up to 10x. While the image is magnified, you can view specific portions of an image by using the arrow buttons. We found magnifying and moving to different areas to be fast and fluid.
To delete an image, press the Function/Erase button. To delete all the images, you must use the Menu button to select the "Erase All" option.
| Playback Screens | ||
 Basic |
 Detailed |
 No info. |
Pressing the Display button causes the camera to cycle through 3 different displays: Basic, Detailed, and No info. The Basic screen contains information about the number of the frame out of the total number on the card, resolution and quality, date & time, and file number. The Detailed screen adds the following information: recording mode, exposure compensation, white balance, flash, metering, and a histogram.
Pressing the Menu button will bring up the following options:
| Play Menu | |
| Protect | Select |
| Rotate | Select |
| Sound Memo | Select |
| Erase All | Cancel, OK |
| Slide Show | Start, Select, Set up |
| Print Order | Order, Set up, Reset |
| Transfer Order | Order |
The Sound Memo feature allows you to associate a sound clip with any image. The maximum recording time is 60 seconds per image. The audio clip is saved as a WAV file with the same number as the image. The Slide Show option allows you to display "all images" or a custom set. The play time for each image can be selected from Manual, 3 - 10 seconds, 15 seconds, or 30 seconds. There is also an option to loop the entire slide show. In the Print Order option, you can specify which images you would like to print using a DPOF (Digital Print Order Format) compatible printer. In addition, you can specify the Print Type from Standard, Index, or Both. The date and file number can also be selected to appear on the images. The Transfer Order option allows you to select which images you would like to transfer automatically to a computer when you connect it.
The S410 incorporates the popular "edit movie" option that is seen in many current digicams. The camera allows you to set new beginning and ending points. Then, you can either overwrite the original video clip or save it is a new file. We think that this is a great option because it allows you to cut out extraneous time from clips to save card space.
The Design: Casio Exilim Ex-Z40

Click to enlarge.
The front of the Casio Ex-Z40 features a lens with a 35mm equivalent 3x zoom of 35 - 108mm. The lens has a maximum aperture of f2.6 at wide angle and f4.8 at telephoto with a shutter speed range of 4 - 1/2000th sec. The lens has a built-in lens cover that opens when the power button is pressed. In the upper-right corner is the viewfinder window. To the left are the self-timer lamp and the microphone. To the upper-left of the lens is the built-in flash with a working range of 1.6 - 11.5 ft. at wide angle and 1.3 - 5.9 ft. at telephoto. Lastly, there is a molded metal grip bar below the flash that is designed to help hold the camera comfortably.

Click to enlarge.
The back of the Z40 houses its large 2" LCD monitor with 84,960 pixels. To the left of the LCD is a speaker. Above the LCD are the viewfinder and two indicator lamps. To the right of the indicator lamps are the camera's Play and Record buttons. These buttons can be used to either switch between the two modes or to power the camera up directly into Play or Record mode. In the upper-right corner is the zoom controller that functions both as the zoom control for the lens in Record mode and as a magnifying tool in Play mode. Below the zoom controller is the Menu button and a multi-directional arrow pad with a separate "Set" button in the middle. This arrow pad is used to navigate through the menus and to select settings. Lastly, just below the arrow pad is the Display button, which is used to select the camera's multiple display options.

Click to enlarge.
The top of the camera is very straightforward. On the right side is the camera's main On/Off button next to the shutter release button. As noted before, the camera can also be powered on by pressing either the Play or Record button on the back. The On/Off button on the top of the camera will power on the camera in Record mode by default.
 Click to enlarge. |
 Click to enlarge. |
On the bottom of the camera is a sliding spring-action door that reveals the SD/MMC card slot and the battery compartment. The Ex-Z40 is powered by a rechargeable NP-40 3.7V 1230mAh Lithium-Ion battery. To the right of the card/battery door is a multi-connector that is used with the supplied cradle. The cradle can charge the battery, transfer data automatically to a computer, connect the camera to a printer, and allow use of the Photo Stand slideshow feature. Finally, on the right is a metal tripod mount that is nearly in-line with the center of the lens.

Click to enlarge.

Click to enlarge.
The right side of the camera features a post for the supplied wrist strap.
The Casio Exilim Ex-Z40 has an attractive and sleek appearance. Also, it is nice to see such a large LCD on an ultra-compact camera. However, we were disappointed to see that TV-out is not offered as an option. This has become a standard for most other digicams. Now, let's take a look at its recording features.
Recording Features: Casio Exilim Ex-Z40
In all recording modes, the Ex-Z40 records images as JPEG files with quality settings: Fine, Normal, or Economy. The resolution options are below:| Resolution (pixels) |
| 2304x1728 |
| 2304x1536 (3:2) |
| 1600x1200 |
| 1280x960 |
| 640x480 |
By default, the left/right arrow keys can be used to select the recording mode of the Z40. However, the recording mode can also be selected in the main menu. The following 5 recording modes are available: Snapshot, Bestshot, Movie, Snapshot Audio, and Voice Recording. Although the Z40 does not have a traditional "Auto" mode, Snapshot mode can be as automatic as you want it to be.
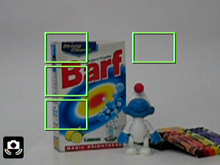
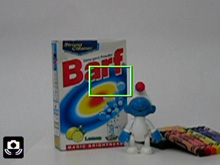
| AF Modes | |
 Spot, AF locked |
 Multi, AF locked |
By pressing the up arrow button, you can select from the following focus options: Auto, Macro, PF, Infinity, and Manual focus. With Auto focus, the camera can be set to either Spot or Multi focus mode. The option to choose Spot or Multi points is in the main menu. With Spot selected, the camera uses the center point for focus. In Multi mode, the Z40 chooses from 7 horizontally-aligned focal points automatically. In macro mode, the camera is able to focus as close as 2.4" from the subject. PF stands for Pan Focus and is used to bypass a full auto-focus for faster shooting. With Manual focus selected, you can use the left/right keys to adjust the focal plane. In addition to the focus types, you can also select the flash mode from the following: Auto, Flash off, Flash on, and Red-eye reduction.
 Info |
 Info w/live histogram |
 No Info |
Pressing the Display button causes the LCD to cycle through the following display options: Info., Info. w/live histogram, no info., and LCD off.
In any of the available recording modes, pressing the Menu button displays the following options for adjustment:
| REC Menu | |
| REC Mode | Snapshot, BestShot, Movie, Snapshot Audio, Voice Recording |
| Self-timer | 10 sec, 2 sec, X3, Off |
| Size | 2304x1728, 2304x1536 (3:2), 1600x1200, 1280x960, 640x480 |
| Quality | Fine, Normal, Economy |
| EV Shift | +/- 2 stops in 1/3 increments |
| White Balance | Auto, Sunlight, Overcast, Shade, Light bulb, Fluorescent, Manual |
| ISO | Auto, 50, 100, 200, 400 |
| AF Area | Spot, Multi |
| Auto PF | On, Off |
| Grid | On, Off |
| Digital Zoom | On, Off |
| Review | On, Off |
| L/R Key | REC Mode, EV Shift, White Balance, ISO, Self-timer, Off |
Self-timer mode on the Z40 offers a special option called X3, which takes 3 pictures in a row. When selected, the camera counts down from 10 seconds to record an image. After a short preparation time, the camera then takes 2 more pictures separated by a short delay. Auto PF refers to "Automatic Pan Focus". With this set to "On", the camera will take pictures without performing a full auto-focus. This enables the camera to take images with a shorter lag time. However, because the camera does not perform a full auto-focus, we only recommend this for subjects that are far away. With the Grid option selected, a 3x3 grid will appear on the LCD monitor to aid in image composition. The L/R Key option is a great idea. It allows you to specify the functionality of the left/right arrow keys. By default, they control the recording mode. However, you can select any of the options listed above to increase efficiency.
We should point out that there are no options to change the metering type. The Z40 always uses multi-pattern metering.
In Bestshot mode, there are 21 presets from which to select as well as a custom option that allows you to specify your own settings for future use. Below are the different presets along with the description that the Z40 provides for each:
| Bestshot modes | |
| Portrait | Enhanced flesh tones |
| Scenery | Infinity focus/Hard Sharpness/High saturation |
| Portrait With Scenery | Enhanced flesh tones |
| Coupling Shot | Uses separate areas to combine two shots. |
| Pre-shot | Shoot the background first, then have someone shoot you in front of it. |
| Children | Enhanced flesh tones and high sensitivity |
| Candlelight Portrait | Soft sharpness and daylight white balance |
| Party | High sensitivity |
| Pet | High sensitivity |
| Flower | Macro Mode/High saturation |
| Natural Green | Hard sharpness and high saturation enhance the green hues. |
| Sundown | Infinity focus/Red filter/Daylight white balance |
| Night Scene | Slow shutter speed/Daylight white balance |
| Night Scene Portrait | Slow shutter speed/Red-eye reduction flash |
| Fireworks | Slow shutter speed/Infinity focus |
| Food | Macro mode/High saturation |
| Text | Macro mode/Hard sharpness/High contrast |
| Collection | Macro mode/Displays a compositional outline |
| Monochrome | Uses the monochrome filter. |
| Retro | Uses low contrast and the sepia color filter. |
| Twilight | Uses high color saturation and the magenta color filter. |
| Register User Scene | Registers a new user scene. |
Movie mode on the Ex-Z40 is capable of recording video with audio in AVI format. The frame rate and resolution are fixed at 15 fps 320x240. The optical zoom is disabled during recording. However, the digital zoom is available. Through the menu, major options such as white balance and ISO are available for adjusting. We will take a look at a sample movie in our General Image Quality section.
With Snapshot Audio mode, you are able to take a picture and then record an audio clip that will be associated with it. The audio clip will be recorded as a WAV file incorporating the same number as the image. In Voice Recording mode, the lens retracts about a second after selecting the mode. You are then able to record audio up to the limit of the internal memory/card capacity. The audio clip is recorded with the next consecutive number.
In all recording modes, there is a Setup menu available with the following options:
| Set Up Menu | |
| Sounds | Startup, Half Shutter, Shutter, Operation (Sound 1-5) Volume (1-7) |
| Startup | Exilim screen, Custom |
| File No. | Continue, Reset |
| World Time | Select Home City, Select World Time City |
| Date Style | YY/MM/DD, DD/MM/YY, MM/DD/YY |
| Adjust (time) | Set |
| Language | Select |
| Sleep | 30 sec, 1, 2 min, Off |
| Auto Power Off | 2, 5, min. |
| REC/PLAY | Power On, Power On/Off, Disable |
| USB | Mass Storage (USB DIRECT PRINT), PTP (PictBridge) |
| Format | Cancel, Format |
| Reset | Cancel, Reset |
The "Sounds" option allows the user to select which sounds the camera should use for its various operations. The Startup option allows you to select either the Exilim startup screen or to select a user image. Selecting Reset for the menu item "File No." will reset the camera's numbering system. The REC/PLAY option allows you to specify the behavior of the Play and Record buttons on the back of the camera. We found the main power button to be a little hard to press, so it is nice to have the option to set the Play/Rec buttons to power on and off the camera. Finally, the Reset option will change the camera back to its factory defaults.
Playback Features: Casio Exilim Ex-Z40
To power on the camera directly into playback mode, you can press the Play button on the back of the camera. If the camera is already in record mode, you can also press the Play button to switch over to play mode. To move to different files, press the left/right arrow keys. No magnification |
 4x magnification |
Magnification of an image is achieved by using the zoom controller. However, the Z40 only allows up to 4x magnification in 4 increments. To view 9 images at a time as thumbnails, you can press the wide end of the zoom controller. If you press the up arrow key, the screen will change to calendar. This allows you to view images from a specific day. Pressing the down arrow key will bring up a dialog with the options: All Files Delete, Delete, and Cancel.
| Playback Screens | ||
 Basic |
 Detailed |
 No info. |
Pressing the Display button will cause the LCD monitor to change between the following display types: Basic, Detailed, No info. The detailed screen contains the following information: shutter speed, aperture, ISO, histogram, EV, record mode, flash mode, white balance, date, time, location of file (card/internal memory), resolution, quality, and image number.
Pressing the Menu button brings up several options:
| Play Menu | |
| Slideshow | Start, Images (All images, One Image, Favorites), Time (1-5, 10, 15, 30, 60 min), Interval (1-30 sec, MAX), Cancel |
| Favorites | Show, Save, Cancel |
| DPOF | Select images, All images, Cancel |
| Protect | On/Off, All Files: On/Off, Cancel |
| Rotation | Rotate |
| Resize (based on 2304x1728) | 1280x960, 640x480, Cancel |
| Trimming | Select |
| Dubbing | Start |
| Create Album | Create, Delete, Layout, Setup, Cancel |
| Alarm | Alarm 1, 2, 3 |
| Copy | Built-in to Card, Card to Built-in, Cancel |
The Favorites feature allows you to tag favorite images for future reference. With DPOF (Digital Print Order Format), you can specify all or specific images for print. There is also an option to add a date stamp on the pictures. The Z40 offers the option to resize images to lower resolutions. When an image is resized, it is saved automatically as a new file. The Trimming option allows you to resize and move a cropping box around an image to create a new cropped version of that image. The Dubbing option allows an audio recording to be associated with an image. The camera allows for a maximum of 60 seconds for each recording. A really cool feature that the Z40 offers is the "Create Album" option. With this feature, the camera will create an HTML photo album with the pictures that you specify. There are 10 different layouts available from which to choose. The Alarm option allows you to set 3 separate alarms to display user-specified pictures. The alarms can be set to go off either once or daily. Lastly, the Copy function allows you to copy files either from the built-in memory to a flash card or vice versa.
The Design: Pentax Optio S40

Click to enlarge.
The front of the Optio S40 features a lens with a 35mm equivalent 3x zoom of 35 - 105mm. The lens has a maximum aperture of f2.6 at wide angle and 4.8 at telephoto. The shutter speed range is 4 - 1/2000th sec. To the upper-left of the lens are the microphone and remote control receiver/self-timer lamp. To the right is the built-in flash with a working range of 0.6 - 11.5 ft. at wide angle and 0.6 - 6.6 ft at telephoto. Just to the lower-right of the flash is the viewfinder window.

Click to enlarge.
On the back of the S40, you will see the 1.6" LCD monitor with 85,000 pixels. Above the LCD monitor is the viewfinder along with two indicator lamps. Directly opposite of the LCD monitor is a 4-way control pad with a separate "Ok" button in the middle. In record mode, the left arrow button selects the flash mode, the right arrow button selects the focus mode, and the up arrow button selects the drive mode. Surrounding the control pad are the Function, Menu, and Display buttons. Above the control pad are the Delete and Playback buttons followed by the zoom controller.

Click to enlarge.
On the far left is the S40's speaker. To the right is the Mode dial with the main power switch located in the center. Just to the left of the Mode dial is a power indicator lamp that stays lit whenever the camera is on. On the far right is the shutter release button.
 Click to enlarge. |
 Click to enlarge. |
On the bottom is a sliding door that reveals the battery compartment. The Optio S40 supports either two Alkaline/NiMH AA batteries or one CR-V3 battery. Although the kit comes with 2 Alkaline AA's, we recommend picking up some NiMH batteries for longer life. On the far right edge, you can also see the plastic tripod mount.
 Click to enlarge. |
 Click to enlarge. |
On the right side is a post for the wrist strap as well as a hinged door that reveals the SD card slot. Although the camera does not come packaged with an SD card, we should point out that there are 11MB of internal memory. We recommend getting at least a 128MB card to get started.
 Click to enlarge. |
 Click to enlarge. |
Recording Features: Pentax Optio S40
In Easy mode (Auto), the S40 records images as JPEG files with quality settings: Superior, Super, Normal, and Economy. In the other still image modes, the quality options are symbolized by stars: *, **, and ***. The resolution options are below:| Resolution (pixels) |
| 2304x1728 |
| 2048x1536 |
| 1600x1200 |
| 1280x960 |
| 640x480 |
To turn on the Optio S40, you must press the On/Off button on the top of the camera in the middle of the Mode dial. There are 9 different recording modes available along the Mode dial: Program, Picture, Easy, Portrait, Landscape, Night-Scene, Movie, Voice Recording, and Digital Effect.
 Basic |
 Detailed |
 Grid |
 No info. |
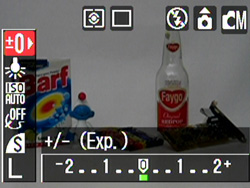
Pressing the Display button in Record mode changes the LCD display from the following options: Basic info., Detailed info. w/live histogram, Grid, No info., and LCD off. In all still recording modes (except Easy mode), pressing the Function button will display a set of customizable options. It is a way to change settings quickly without going through the menu. In Easy mode, the Function button operates as a help menu to describe the functions of each recording mode.
Easy mode is essentially Auto mode in that the camera decides most of the settings and leaves very few options available to the user. For example, pressing the menu button only offers the option to change the recording quality. The other options are available via the control pad. Pressing the left arrow key will change the flash mode from Auto, Off, On, Auto w/Red-eye reduction, and On w/Red-eye reduction. The right arrow key controls the focus mode and selects from Auto, Macro, Super Macro, Infinity Landscape, and Manual Focus. Finally, the up arrow key changes the drive mode from Single, Self-timer (10 sec), Self-timer (2 sec.), Continuous Drive, Remote Control (3 sec.), and Remote Control. In regular macro mode, the camera can focus as close as 7.09 inches. But with Super macro mode, the camera can focus as close as 2.36 inches from the subject.
Program mode offers automatic exposure control like Easy mode with one main difference: the user has access to several additional options. In all recording modes other than Easy and Voice Recording, pressing the menu button will display the following list of available options:
| Rec. Menu | |
| Recorded Pixels | 2304, 2048, 1600, 1024, 640 |
| Quality Level | ***, **, * |
| White Balance | Auto, Daylight, Shade, Tungsten, Fluorescent, Manual |
| Focusing Area | Multi, Spot |
| AF Metering | Multi-segment, Center-weighted, Spot |
| Sensitivity | Auto, 50, 100, 200, 400 |
| Digital Zoom | On, Off |
| Instant Review | Off, 0.5, 1, 2, 3, 5 sec. |
| Memory | Flash, White Balance, EV Compensation, Focusing Area, AF Metering, Sensitivity, Digital Zoom, Focus Mode, Zoom Position, MF, Display, File # |
| Sharpness | 3 increments |
| Saturation | 3 increments |
| Contrast | 3 increments |
| EV Compensation | +/- 2 stops in 1/3 increments |
| AF Modes | |
 Multi, AF locked |
 Spot, AF locked |
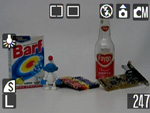
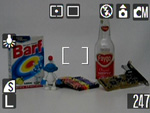
With Multi selected as the focusing area, the S40 uses 5 horizontal focal points to determine the best area of focus. When Spot is selected, the default focal point is in the very center of the frame. In order to focus on off-center subjects in Spot mode, you must half-press the shutter button while focusing on the subject. Then, re-frame the scene before pressing the shutter button fully. The S40 offers a full array of options for metering. With Multi-segment selected, the camera will use the entire frame to determine the best exposure. With Center-weighted, the camera will place more emphasis on the center of the frame to determine the exposure. Finally, with Spot metering, the camera uses a very small portion of the center of the frame. Strangely, the camera does not indicate a "spot" guide on the LCD screen. Most cameras will use an overlay that marks the "spot" area to aid in proper metering. For example, with Spot selected as the focusing area, the camera displays brackets to show where the focal point is.
The Memory options allow you to specify which settings to remember when the camera is turned off and back on again. By default, the Flash, Digital Zoom, and File # options are checked for memory. If items are not checked, they will be reset to their defaults when the camera is turned on again.
In Picture mode, the following presets are available: Flower, Self-portrait, Surf, Snow, Sunset, Museum, Text, Food, Landscape portrait, and Marine. Each of these presets has specific predetermined settings that are designed to produce optimal results in certain circumstances. For example, in Flower mode, the camera saturates the colors to make the flowers more appealing.
The next three modes are Portrait, Landscape and Night-Scene. These are also presets like the Picture mode options. With Portrait mode selected, the S40 will use a large aperture setting. This creates a "portrait effect" where the background is out of focus while the subject is in focus. The Landscape mode is the exact opposite. The camera selects a small aperture setting in order to create a large depth of field where the foreground and background are both in focus. In Night-Scene mode, the S40 can utilize a slow-sync feature. With slow-sync, the camera fires a flash to illuminate the subject. This flash is followed by a longer exposure to capture ambient light, creating a natural-looking well-lit subject. Night-Scene mode can also be used to perform long exposures of distant subjects without use of the flash.
Movie mode on the Optio S40 is capable of recording video with audio at 30fps with a resolution of 320x240. The file format is AVI and the duration is only limited by the capacity of the flash card. The optical zoom is disabled during recording. However, the digital zoom is available. Major menu options such as white balance and ISO are available for adjustments. We will look at a sample clip in our General Image Quality section of this article.
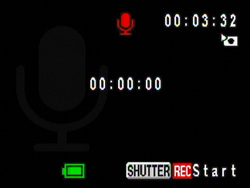
Voice Recording mode
In Voice Recording mode, the lens will retract if it is extended. The available recording time is displayed in the upper-right corner of the LCD monitor. To start and stop recording, you must press the shutter button. The sound clip is recorded as a WAV file with the same number sequence as recorded images.
| Filters |
| B&W |
| Sepia |
| Red |
| Green |
| Blue |
| B&W + Red |
| B&W + Green |
| B&W + Blue |
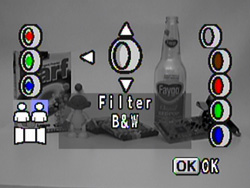
Digital Effect mode
The Digital Effect mode offers the above eight color filters that you can apply to pictures. Digital Effect mode also offers a feature called Two-in-One mode whereby you can take a picture one half at a time. Also, there is a Panorama Assist mode that aids in taking pictures that can later be joined using the supplied software.
In recording mode, a Set-up menu is available by pressing the Menu button. There are several options that pertain to camera operation.
| Set Up Menu | |
| Format | Format, Cancel |
| Sound | Volume (7 increments) Start-up Sound (1,2,3) Shutter Sound (1,2,3) Operation Sound (1,2,3) |
| Date/Adjust | Set |
| World Time | Set |
| Language | Select |
| Screen Setting | Start-up Screen (Optio, User) Background color (1-9) Screen effect (On, Off) |
| Brightness Level | 15 increments |
| Video Out | NTSC, PAL |
| USB Connection | Personal Computer, PictBridge |
| Auto Power Off | Off, 3, 5 mins. |
| Fn Setting | Up, Down, Left, Right (Recorded Pixels, Quality Level, White Balance, Focusing Area, AE Metering, Sensitivity, Sharpness, Saturation, Contrast, EV Comp. +/-, Off) |
| Reset | Reset, Cancel |
The Screen Setting allows you to customize the look of the menu system. You can select a custom startup screen from an image on the camera/card, select a background pattern/color, and turn on or off "Screen effect", which is the animation of the menus. The brightness of the LCD monitor can be adjusted in 15 increments. The Fn Setting allows you to customize what the up and left/right arrow keys will do when the Function button is pressed. The Reset option will reset the camera back to its factory defaults.
Overall, we found the S40 to have a bit of a learning curve when finding and changing settings. Another thing that becomes annoying is the flash charge time when the camera is turned on. The LCD will turn on and the lens will extend. At this point, the LCD screen will turn off and the flash indicator light will blink while the camera charges the flash. To avoid this irritating startup delay, we found ourselves making sure that the memory was set to remember the flash setting and that the flash was set to "Off" before turning off the camera.
Playback Features: Pentax Optio S40
To power the camera on in "Playback Only" mode, you must hold down the Play button while pressing the main power button. You can also switch to playback mode from record mode by pressing the Play button. In playback mode, the left/right arrow keys cycle through existing pictures. To delete a picture, press the Delete button and choose "Delete" from the dialog. To delete all the images, videos, and sound clips, you simply press the Delete button again and choose "Delete All" from the dialog.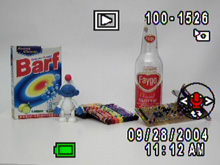 > >No magnification |
 12x magnification |
You can use the zoom controller to magnify an image up to 12x. Magnifying an image is quite smooth when you hold down the zoom controller. However, moving across an image while zoomed in is somewhat slow. You can press the Ok button to view the image at full screen again. To view images 9 at a time as thumbnails, you can press the left side of the zoom controller while viewing an image at full screen.
| Playback Screens | ||
 Basic |
 Detailed |
 No info. |
By pressing the Display button, you can toggle between the above screens. The detailed screen displays the following information: resolution, quality, white balance, ISO, metering, histogram, shutter speed, aperture, file number, date & time, and the option to record/play a voice memo. If you press the Function button during playback, you will get a help screen that explains the functionality of the arrow keys and the Ok button. The Mode dial must be set to Easy mode for this to work.
Pressing the Menu button during playback will offer the following options:
| Playback Menu | |
| Protect | Select |
| DPOF | Copies/Date |
| Slideshow | 1, 3, 5, 10, 20, 30 sec. |
| Resize (based on a 2304x1728 image) | Recorded Pixels (2048, 1600, 1024, 640, 320) Quality Level (***, **, *)/td> |
| Copy image/sound | Camera to Card, Card to Camera, Cancel |
| Digital Filter | B&W, Pencil 1, Pencil 2, Pencil 3, Soft, Blue1, Green1, Red1, Blue2, Green2, Red2, Brown |
| Quick Zoom | On, Off |
| Quick Delete | On, Off |
DPOF (Digital Print Order Format) allows you to specify how many copies you want of each picture. There is also an option to "stamp" the image with the date. You can specify the length of time that each picture is shown for the slideshow feature. By pressing set, the slideshow will begin. The Resize option allows you to downsize an image as well as choose a different/lower quality setting. The S40 gives you the option to overwrite the original file or to save the resized image as a new file. The "Copy image/sound" option allows you to transfer files between the camera's internal memory and a flash card. The Digital Filter option offers several post-processing filters from which to choose. After applying the filter, you are given the option to overwrite the file or to save a new file. Quick Zoom and Quick Delete are designed to save time. With Quick Zoom on, pressing the Magnify button (telephoto side of zoom controller), the image will zoom to the maximum 12x automatically. With Quick Delete on, when you press the Delete button, the "Delete" option will be highlighted. By default, the camera will select the "Cancel" option as a safeguard.
Battery Performance
Our general method for battery testing is to reset the camera to its default settings and change the recording mode to the highest quality option. Then, we take 5 pictures without the flash and 2 pictures with the flash until the battery is dead. For more information on our battery test, please refer to our Testing Procedures page. For this test, we used the supplied proprietary batteries for the Canon S410 and the Casio Ex-Z40. For the Pentax Optio S40, we used our pair of NiMH Power2000 2500mAh batteries. All batteries were fully drained before charging for the test.| Number of shots taken in one battery charge | |
| Canon S410 | 610 |
| Casio Z40 | 1,767 |
| Pentax S40 | 1,236 |
The Casio Z40 showed a really outstanding performance, taking 1,767 frames on a single charge with its 1230mAh rechargeable NP-40. The Pentax S40 also performed very well, shooting 1,236 frames on our 2500mAh Power2000 NiMH batteries. The 840mAh NB-1LH rechargeable battery provided the Canon S410 with 610 frames on one charge. Although, the Canon S410 took the least number of frames, all three cameras proved to have extraordinary battery performance. Keep in mind that casual use of any of these cameras will result in lower numbers than we were able to achieve. Our test consists of shooting continuously until the battery is dead.
The Timing Tests
* NOTE: For all of our time tests, the cameras were reset to their factory default settings and set to record using the highest resolution and quality setting. The cameras were set to Auto mode without flash (unless otherwise noted). We also disabled all sounds. A PNY 512MB SD card and a SanDisk Ultra II 512MB CompactFlash card were used.For both Startup Time and Shutter Lag time, the menu setting "Quick Shot" and "PF" are disabled on the Canon and Casio (respectively) to force both cameras to focus. If turned on, the cameras would take pictures without performing a full auto-focus when the shutter button is pressed.
Before reading our results, please refer to our Testing Procedures page.
Startup Time
The startup time is recorded from the moment the power button is pushed to the moment the shutter sounds. The cameras were set to startup in Auto mode. All startup sounds and images were disabled if possible.| Startup time (seconds) | |
| Canon S410 | 3.48 |
| Casio Z40 | 2.15 |
| Pentax S40 | 3.63 |
The Casio Z40 is clearly the winner here at a remarkable 2.15 seconds. The Pentax S40 showed the worst startup performance at 3.63 seconds. As we mentioned earlier in the article, the S40 takes longer to startup when the flash is enabled. The only way around this is to set the camera to remember the flash setting and to disable it before turning it off. Otherwise, the average startup time is 4.94 seconds. The Canon S410 showed a fairly average startup time of 3.48 sec.
Shutter Lag
To record shutter lag, we perform two tests. For the first test, we pre-focus the lens and measure the amount of time it takes the camera to take a picture after the shutter button is pressed. The second test measures the time it takes for the camera to take a picture after we press the shutter button without pre-focusing. Both tests are performed with the camera set at its full wide zoom position. Each test is performed 3 times and the results are averaged. For more information regarding our testing procedures, please refer to our Testing Procedures page.| With Pre-focus (seconds) | Without Pre-focus (seconds) | |
| Canon S410 | 0.09 | 0.93 |
| Casio Z40 | 0.09 | 0.52 |
| Pentax S40 | 0.29 | 0.78 |
When we pre-focused the cameras, the Canon S410 and the Casio Z40 had the same impressive lag time of 0.09 sec., while the Pentax S40 was quite slow at 0.29 sec. When we included focus time in the test, the Canon S410 dropped to the bottom of the list at 0.93 sec. The Pentax S40 was the second slowest at 0.78 sec. and the Casio Z40 clocked in at an impressive 0.52 sec. Although the Canon and Casio cameras have optional "Quickshot" and "PF" modes that cause the cameras to shoot faster, we disabled them for the test because they do not perform a full auto-focus.
Overall, the Casio Z40 showed the best shutter lag times. It is a tough call between the Canon S410 and the Pentax S40. If you are someone who is constantly pre-focusing before shooting, the Canon might have the second best time. However, if you are someone who never pre-focuses, you might think that the Pentax S40 deserves second place.
Write Times
We recorded 5 different write times with a PNY 512MB SD card and a SanDisk Ultra II 512MB CompactFlash card.Single Shot - The time it takes for a single picture to be completely written to the flash card (the time the "activity light" is on).
Shot To Shot (STS) - The time until the second shot is able to be taken after the first (shutter to shutter).
Shot To Shot w/Flash - The time it takes for the camera to take two pictures with the flash starting from the moment the first flash is fired to the moment the second is fired.
Shot To Shot w/Buffer Full (to next frame) - The time between taking the last shot of a burst to the moment the shutter sounds again.
Clear Buffer for Next Burst - The time between taking the last shot of a burst to the moment the first frame of the next burst is taken.
We set the cameras to their highest resolution and quality setting and ran 4 tests. We performed each test three times and averaged the results. Below are the resolution, quality setting, and average file size used for the tests:
Canon S410 - 2272x1704, Superfine, Avg. file size = 2.37 MB
Casio Z40 - 2304x1728, Fine, Avg. file size = 1.82
Pentax S40 - 2304x1728, Superior, Avg. file size = 2.48 MB
| Single Shot | Shot To Shot | Shot To Shot w/Flash | Shot to Shot (in "Burst" mode) |
Clear Buffer for Next Burst | |
| Canon S410 | 2.33 | 1.84 | 4.52 | 1.07 | 7.27 |
| Casio Z40 | 1.14 | 1.84 | 9.04 | - | - |
| Pentax S40 | 1.26 | 3.75 | 12.21 | 1.58 | - |
Both the Canon S410 and the Casio Z40 have a shot-to-shot time of 1.84 sec. The difference is that the Casio is able to shoot at this speed forever while the Canon slows down after 4 shots. The Pentax S40 had a relatively slow shot - to-shot time of 3.75 sec. When it comes to Shot to Shot w/Flash time, the Canon takes the lead at 4.52 sec. The Casio has a slow time of 9.04 seconds followed by the super-slow Pentax at 12.21 seconds.
In High-Speed Continuous mode, the Canon S410 fills its buffer after taking 3 frames at 2.8 fps. In Standard Continuous mode, it can take 4 frames at 1.79 fps. It takes the S410 7.27 seconds to completely clear its buffer. In Continuous mode, the Pentax S40 is able to take pictures at 0.6 fps until the memory card is full. Although the Casio Z40 does not have a continuous drive option, we were impressed that its Shot to Shot time came close to the Pentax's continuous speed.
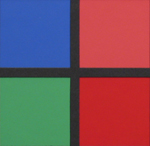
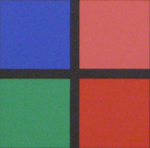
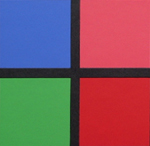
Resolving Fine Lines
For our resolution test, we reset all cameras to their default settings and then used the highest resolution and quality setting. The cameras were set between +0.7 - 1.3 E.V. For more information, refer to our Testing Procedures page. Below are 200% crops of the test. Click on a crop to see the full chart.| Canon S410 +1.0 EV |
 Click to enlarge. |
| Casio Z40 +0.7 EV |
 Click to enlarge. |
| Pentax S40 +1.3 EV |
 Click to enlarge. |
Both the Canon S410 and The Pentax S40 are able to retain line definition up to the 12 mark before artifacts begin to appear. However, we should point out that the Pentax S40 begins to show artifacts a bit earlier than the Canon S410. Both cameras move to extinction by the 14 mark. The Casio Z40 is only able to make it to the 11 mark before the lines lose their definition. Extinction occurs around 13.
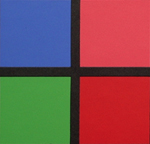
| Canon S410 +1.0 EV |
Click to enlarge. |
| Casio Z40 +0.7 EV |
Click to enlarge. |
| Pentax S40 +1.3 EV |
Click to enlarge. |
In the vertical crop, the Canon S410 performs a bit better than in the horizontal crop. It is able to hold its resolution a little past the 12 mark. Also, the lines appear much sharper. The Casio Z40 looks about the same with detail at 11 and extinction at 13. It is important to note that in both Casio crops, moiré becomes visible just after the 11 mark. The Pentax S40 shows a slight improvement in the vertical crop. Extinction occurs at 14.
All of these cameras showed impressive resolution performance. However, the Canon S410 has a bit of an advantage over the Pentax S40 with its cleaner image and slightly higher resolution. The Pentax S40 is the runner up with exceptional resolution followed by the Casio Z40 with decent resolution and some visible moiré.
Color Reproduction
* For all of our color tests, we reset the cameras to their factory default settings. They were then set to record using the highest image quality option with auto exposure.Tungsten WB
We took a picture of our color chart using each of the following WB settings: Auto, Tungsten, and Manual. Click on a thumbnail below to view the full-size image.| Auto WB | Tungsten WB | Manual WB | |
| Canon S410 |  Click to enlarge. |
 Click to enlarge. |
 Click to enlarge. |
| Casio Z40 |  Click to enlarge. |
 Click to enlarge. |
 Click to enlarge. |
| Pentax S40 |  Click to enlarge. |
 Click to enlarge. |
 Click to enlarge. |
 Reference Chart ("actual colors") |
|||
| Auto WB | Tungsten WB | Manual WB | |
| Canon S410 |  |
 |
 |
| Casio Z40 | 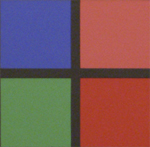 |
 |
 |
| Pentax S40 | 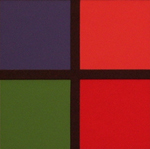 |
 |
 |
The Z40 shows a remarkably accurate performance with the Auto WB setting. As you can see, both the S410 and the S40 produce the color chart with a yellowish cast. Another thing to notice is that the S40 has slightly underexposed the chart. When the cameras are set to Tungsten WB, the results are much better. The Canon S410 produces very accurate and well-saturated colors. While the Casio Z40 shows accurate colors, the chart is a little overexposed. The Pentax S40 appears to have a slightly cool (blue) cast in addition to being underexposed. With the cameras set to Manual WB, the Canon and the Casio are very accurate, while the Pentax has a cool cast again. This time, both the Casio Z40 and the Pentax S40 have underexposed the chart.
Daylight WB
We took a picture of our color chart using each of the following WB settings: Auto, Daylight/Sunlight, and Manual. Click on a thumbnail below to view the full-size image.| Auto WB | Daylight WB | Manual WB | |
| Canon S410 |  Click to enlarge. |
 Click to enlarge. |
 Click to enlarge. |
| Casio Z40 |  Click to enlarge. |
 Click to enlarge. |
 Click to enlarge. |
| Pentax S40 |  Click to enlarge. |
 Click to enlarge. |
 Click to enlarge. |
| Reference Chart ("actual colors") |
|||
| Auto WB | Daylight WB | Manual WB | |
| Canon S410 |  |
 |
 |
| Casio Z40 |  |
 |
 |
| Pentax S40 |  |
 |
 |
In daylight, all three cameras did a pretty good job producing accurate color with their Auto WB settings. That being said, the Canon S410 shows the best exposure. The Casio Z40 has slightly overexposed its chart while the Pentax S40 has slightly underexposed its chart. Also, the Casio Z40 appears to have a very slight bluish cast. It's the same story when the cameras are set to Daylight/Sunlight WB. The Canon and the Pentax produce very accurate colors and the Casio is slightly cooler. As you would expect, all three cameras show accurate color reproduction when set to Manual WB. The only real difference is in the exposure: the Casio is the lightest and the Pentax, the darkest.
Overall, all three of these cameras did well. We were really impressed with the Casio's Auto WB performance in tungsten light. It would have been the clear winner if not for its tendency to slightly overexpose the charts with a slightly bluish cast. The Pentax S40 did a good job as well. The main problem that we had was with its tendency to underexpose the charts (particularly under tungsten light). In the end, we think that the Canon S410 shows the best performance. Although it shows the typical yellowish-cast in tungsten lighting with Auto WB, in every other test, the S410 reproduced the color chart with bright, accurate, and well-saturated colors.
Studio Shot
In this shot, we tested each camera's ability to reproduce colors in our studio shot using different WB settings with tungsten light. This provides an easier way to see the differences between the different settings. The cameras were set to Auto w/out flash.| Auto WB | Tungsten WB | Manual WB | |
| Canon S410 |  Click to enlarge. |
 Click to enlarge. |
 Click to enlarge. |
| Casio Z40 |  Click to enlarge. |
 Click to enlarge. |
 Click to enlarge. |
| Pentax S40 |  Click to enlarge. |
 Click to enlarge. |
 Click to enlarge. |
It is clear that the Casio has the best Auto WB ability. However, in the manual WB shot, you can see the bluish cast quite clearly. In our studio shot, it appears that the Canon S410 has slightly underexposed its images while the Pentax S40 shows a good exposure. This is the opposite of what we saw in our color charts.
Built-in Flash
For the flash test, we set all cameras to Auto mode w/Auto flash. The picture was taken from 5 feet away.| Canon S410 | Casio Z40 | Pentax S40 |
 Click to enlarge. |
 Click to enlarge. |
 Click to enlarge. |
Our flash test revealed that the Casio Z40 has the best performance. The Canon S410 produced fairly accurate skin tones, but underexposed the shot. The Pentax S40 overexposed the image with a slight bluish cast. Overall, the Casio shows a good skin tone and exposure.
Noise
The noise test consists of pictures of our studio shot taken at increasing ISO levels to show the effect on the image. The pictures were taken after resetting the cameras to their factory default settings. The cameras were then set to record with the highest quality option with manual WB. Click on a 100% crop below to view the full-size image.| Canon S410 | Casio Z40 | Pentax S40 | |
| ISO 50 |  Click to enlarge. |
 Click to enlarge. |
 Click to enlarge. |
| ISO 100 |  Click to enlarge. |
 Click to enlarge. |
 Click to enlarge. |
| ISO 200 |  Click to enlarge. |
 Click to enlarge. |
 Click to enlarge. |
| ISO 400 |  Click to enlarge. |
 Click to enlarge. |
 Click to enlarge. |
In our noise test, it appears that the Canon S410 has the best overall performance. There is very little increase in noise from ISO 50 to 200. Even at ISO 400, the image is very usable. The difference between the Casio Z40 and the Pentax S40 is not huge. At ISO 50 and 100, noise levels are low and detail is high. If we look at ISO 200 and 400, however, we can see that the Pentax S40 retains more detail than the Casio Z40 at higher ISO levels. In fact, the Z40 image is almost unusable with such a loss of detail. If we compare all three cameras at ISO 400, Canon takes the cake by producing a grainy but detailed image.
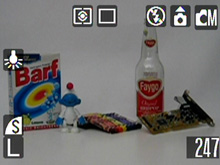
General Image Quality
For our general image quality tests, all cameras were reset to their factory default setting. Then, they were set to their highest quality recording setting. The pictures were then taken with the use of a tripod and in Auto mode unless otherwise stated. Click on a thumbnail to view the full-size image. The crops below the thumbnails are 100%.| Canon S410 | Casio Ex-Z40 | Pentax S40 |
 Click to enlarge. |
 Click to enlarge. |
 Click to enlarge. |
 |
 |
 |
| The S410 produces a sharp and well-saturated image. | In this image, the Z40 shows highly visible jaggies along the edge of the "A" in this image. | The Z40 does a pretty good job here. There are no real issues to speak of. |
In this first image, both the Canon and the Pentax show a good amount of detail. The Canon appears to use a bit more default saturation than the other two cameras. Although the Casio camera produces a decent amount of detail, there are visible jaggies along sharp edges.
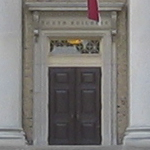
| Canon S410 | Casio Ex-Z40 | Pentax S40 |
 Click to enlarge. |
 Click to enlarge. |
 Click to enlarge. |
 |
 |
 |
| In this image, the S410 displays an incredible amount of detail with bright vibrant colors. | The Z40 had some trouble defining detail in this crop. The camera incorrectly set itself to "Portrait" mode, which explains the blurriness. | The S40 does a decent job with detail in this crop. Notice a slight blue cast compared to the other cameras. |
The Canon S410 shows its amazing ability to resolve fine details in this image. The Casio Z40 auto-detected a Portrait scene and produced a blurry image. The Pentax S40 does a better job than the Casio. However, notice the slightly cool cast on the crop. All three cameras overexposed the top of the building, destroying any sky detail.
| Canon S410 | Casio Ex-Z40 | Pentax S40 |
 Click to enlarge. |
 Click to enlarge. |
 Click to enlarge. |
 |
 |
 |
| Although the Canon shows great detail, it also displays significant chromatic aberrations. | The Casio is free of chromatic aberrations. However, notice the jaggies along the edges. | No chromatic aberrations here either. However, the image is noticeably overexposed. |
In this image, we detected a bit of chromatic aberration in the Canon sample. The Casio Z40 did not show any signs of chromatic aberrations, however, the jaggies are still in full-effect. The Pentax S40 is aberration-free as well and the image is overexposed.
Overall, the Canon S410 has the most impressive image quality. The only major flaw that we can find is the visibility of chromatic aberrations. But even these were not so strong as to jeopardize the overall image quality. The Canon consistently produces sharp and well-saturated images with accurate color. The Casio Z40 shows jaggies along edges and produces the blurriest pictures out of the bunch. The Pentax is a decent performer, but is not as sharp and detailed as the Canon. Also, it appears to have some trouble exposing images properly with accurate color. We should also mention that we detected noticeable corner-blurring with all three cameras - something that is common in ultra-compact cameras.
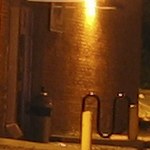
Night mode
In this section, we take a look at each camera's night shot ability. First, we compared the "Long Exposure" mode on the Canon S410 to the "Night Scene" mode on the Casio Z40.| Canon S410 Long Exposure |
Casio Ex-Z40 Bestshot - Night Scene |
 (3.2 sec, f2.8) Click to enlarge. |
 (3.2 sec., f2.6) Click to enlarge. |
 |
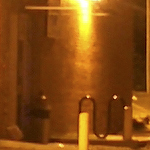 |
| In this crop, the difference in clarity and detail is striking. The Canon S410 captures a significant amount of detail in the background as well as the foreground (the car). In addition, the camera handles noise very well. | The Casio Z40 is not nearly as clear and detailed as the Canon. The noise level is a bit higher than the Canon and we spotted several "stuck" pixels in the sky. |
This image really shows the Canon S410's ability to take clear and low-noise night images with very little light. The Casio Z40 showed an average performance and we were not happy to see stuck pixels appearing in the sky.
| Pentax S40 Night Scene (portrait) |
 (1.6 sec., f3.9) Click to enlarge. |
 |
| In this slow-sync image, the Pentax S40 shows decent low-light noise control. Also, notice that the flash produced a cool cast on the subject's skin. |
Movie Mode
| Canon S410 | Casio Ex-Z40 | Pentax S40 |
 (320x240, 15 fps) Right click to download. |
 (320x240, 15 fps) Right click to download. |
 (320x240, 30 fps) Right click to download. |
None of these cameras has a truly impressive movie mode. However, the extra fps on the Pentax does make the video much smoother. We felt that the sound quality on the Canon S410 was the best followed by the Casio Z40.
Final Words
The Canon PowerShot S410, Casio Exilim Ex-Z40, and Pentax Optio S40 are cameras with similar dimensions and features. All three cameras offer a 3x optical zoom and 4 megapixel output. In addition, all three cameras have similar exposure controls allowing for the adjustment of white balance, ISO setting, exposure compensation, and AF points. In our tests, however, we discovered some major performance differences.Starting with speed, the Casio Z40 has the fastest startup and shutter lag times. Also, it matches the Canon S410 with a very fast shot-to-shot time. The Pentax S40 proved to be the slowest camera with its 3.75 sec. shot-to-shot time and its super-slow 12.2 shot - to-shot w/flash time. We were also annoyed by the startup delay of the S40 while the flash charges during startup. Fortunately, we were able to disable the flash to avoid this startup wait. The Canon camera performed well in respect to shot-to-shot time with and w/out flash and also pre-focused shutter lag.
We were very impressed with the Casio Z40's auto WB performance under tungsten light. Unfortunately, with all other settings, the Z40 was either overexposed or had a slightly cool cast. The Pentax S40 showed decent color reproduction other than the occasional cool cast and underexposure. Overall, the Canon S410 showed the most accurate color reproduction capability. In addition, the S410 consistently produced vibrant, well-saturated, and balanced exposures.
We not only found the Canon to have the best color reproduction, but also the best resolution. In our resolution chart, the Canon S410 and Pentax S40 showed similar performances. They both proved to capture great detail. However, the S410 produced the clearest chart with a bit more resolving power than the S40. The Casio Z40 showed decent resolution. However, we noticed some moiré at its limits. When it comes to noise performance, the Canon takes the lead again. At ISO 400, the S410 retains an incredible amount of detail. The Pentax S40 came in a close second with a fair amount of detail, while the Casio Z40 was the worst with a large loss of detail.
In the end, we had to choose the Canon PowerShot S410 as the best camera of the bunch. It produces bright, colorful, well-exposed, and sharp pictures very consistently. The Pentax Optio S40 would be our second choice because of its impressive image quality and long battery life. The Casio Exilim Ex-Z40 had a lot of potential to be a great camera. For example, it has the smallest build, largest LCD monitor, fastest startup time, extraordinary battery life, and wonderful auto white balance in tungsten lighting. However, it simply does not deliver images that are of the same quality as the S410. It produces images with jaggies visible along straight lines and a high level of noise. Also, there is no option to select metering and it does not offer TV-out capability. To top things off, it is the most expensive of these three cameras. The choice always comes down to the user. If speed is more important than image quality, perhaps the Casio Z40 is the perfect camera. We chose a more well-balanced camera with excellent image quality: the Canon PowerShot S410.
| Canon S410 | |
| Pros | Cons |
|
|
| Casio Ex-Z40 | |
| Pros | Cons |
|
|
| Pentax S40 | |
| Pros | Cons |
|
|
Thanks again to Newegg.com for loaning us the Canon PowerShot S410, Casio Exilim Ex-Z40, and Pentax Optio S40 for review.


